There’s something magical about growing sage from seed. The journey from a tiny speck to a fragrant, thriving herb in your garden is a rewarding one, but it’s not without its challenges. If you’re looking to nurture sage seeds with proper care, you’ve come to the right place. I’ve spent years tinkering in my own herb garden, learning through trial and error what works (and what doesn’t) when it comes to cultivating sage. Whether you’re a seasoned gardener or just starting out, I’m here to share practical tips, personal insights, and expert-backed advice to help you succeed. Let’s dig in—pun intended—and explore how to give your sage seeds the best start possible.
Why Sage Seeds Deserve Your Attention
Sage, or Salvia officinalis, isn’t just another herb to toss into your kitchen recipes. It’s a powerhouse of flavor, history, and even medicinal value. But here’s the kicker: growing sage from seed isn’t as straightforward as, say, basil or mint. Sage seeds have a reputation for being finicky, with germination rates that can test your patience. So, why bother? Well, starting from seed gives you control over the variety—think pineapple sage or purple sage—and it’s often more cost-effective than buying seedlings. Plus, there’s a certain pride in nurturing a plant from its very beginning. Imagine harvesting leaves from a sage plant you’ve raised from a tiny seed. That’s a gardener’s high right there.
Starting Strong: Choosing Quality Sage Seeds
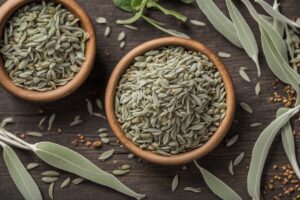
Before you even think about soil or water, let’s talk seeds. Not all sage seeds are created equal, and I learned this the hard way a few summers ago when I bought a cheap packet from a discount store. Half didn’t germinate, and the ones that did were weak and spindly. Lesson learned: source your seeds from reputable suppliers or local nurseries. Look for organic or heirloom varieties if possible—they’re often more resilient and true to type. Check the packet for a harvest or packing date; fresher seeds (less than a year old) tend to have higher germination rates. If you’re unsure, do a quick viability test by soaking a few seeds in water for 24 hours. Viable seeds often sink, while duds float. It’s not foolproof, but it’s a decent starting point.
Setting the Stage: Soil and Container Prep
Sage seeds crave the right environment to sprout, and that starts with soil. These little guys hate heavy, waterlogged conditions, so aim for a well-draining mix. I usually blend equal parts potting soil, perlite, and coarse sand to create a light, airy medium. If you’re planting directly in the ground, work in some compost or grit to improve drainage—sage is a Mediterranean herb, after all, and thrives in lean, gritty soil. Now, containers: I’ve had great luck starting seeds in small pots or seed trays with drainage holes. Why risk soggy roots? Fill your containers about three-quarters full, leaving room for watering without overflow. And here’s a tip from experience—sterilize your containers with a quick rinse of diluted bleach solution if you’re reusing them. Trust me, you don’t want fungal issues sneaking up on you.
The Art of Sowing: Timing and Technique
Timing is everything when you nurture sage seeds with proper care. Sage prefers to start indoors 6-8 weeks before the last frost if you’re in a colder climate. For me, in zone 6, that means early March. If you’re in a milder area, direct sowing in spring or fall can work, but protect those seeds from heavy rains or scorching sun. When sowing, don’t bury them too deep—sage seeds need light to germinate. Press them gently into the soil surface or cover with the thinnest layer of vermiculite, about 1/8 inch. Space them an inch or two apart to avoid overcrowding. Then, mist the soil lightly with a spray bottle. Why not pour water? Because you’ll risk displacing those tiny seeds. Keep the soil consistently moist but not soggy, and place the tray in a warm spot—around 65-70°F is ideal. I’ve found that a sunny windowsill or a heat mat works wonders. Expect sprouts in 10-21 days, though don’t be discouraged if it takes longer. Patience is a gardener’s best friend.
Growing Pains: Caring for Sage Seedlings
Once your sage seeds sprout, the real nurturing begins. Those delicate green shoots are vulnerable, so handle them with kid gloves. First, light is critical—give them at least 6-8 hours of indirect sunlight daily. If natural light is scarce, a grow light on a 12-14 hour cycle can save the day. I’ve had seedlings stretch and get leggy from too little light, and it’s a pain to correct. Watering is another balancing act; let the top inch of soil dry out slightly between waterings to prevent root rot. And here’s something I wish I’d known sooner—don’t over-fertilize. Sage doesn’t need much feeding, especially at this stage. A diluted, balanced liquid fertilizer once a month is plenty, if at all. As they grow, thin out weaker seedlings to give the strongest ones room to thrive. It feels harsh, but it’s for the greater good. When they’re about 2-3 inches tall with a couple of true leaves, harden them off by gradually exposing them to outdoor conditions over a week. Picture this: you’ve got a tray of sturdy little sage plants ready for the garden. That’s the goal.
Long-Term Love: Transplanting and Beyond
Transplanting is where your hard work starts to pay off, but it’s also where things can go south if you’re not careful. Choose a sunny spot in your garden with at least 6 hours of direct light—sage loves to bask. Space plants about 18-24 inches apart; they’ll spread out over time. Dig a hole just deep enough to cover the root ball, and don’t bury the stem too deep or you’ll invite rot. After planting, water thoroughly to settle the soil, then ease up—sage is drought-tolerant once established and hates “wet feet.” Mulch with gravel or small rocks to retain moisture and keep weeds at bay, but avoid organic mulch that holds too much water. Prune regularly to encourage bushy growth, and watch for pests like spider mites or powdery mildew, though sage is pretty tough. I remember one summer when aphids tried to crash the party on my sage plants. A quick blast of soapy water sent them packing, no chemicals needed. As the seasons roll on, harvest leaves sparingly in the first year to let the plant build strength. By year two, you’ll have a sage bush that’s practically a flavor factory.
Now, let’s address the elephant in the room: not every seed will make it. Some won’t germinate, others might succumb to damping-off (a fungal disease), and that’s okay. Gardening is as much about resilience as it is about results. Keep notes on what works for you—soil mix, watering schedule, light levels—and tweak as you go. Over the years, I’ve found that nurturing sage seeds with proper care is less about perfection and more about persistence. Stick with it, and you’ll be rewarded with a hardy herb that’s worth every ounce of effort.
References
- University of Minnesota Extension – Growing Herbs
- Missouri Botanical Garden – Salvia officinalis
- Penn State Extension – Herb Gardening
- Royal Horticultural Society – Growing Sage
- Clemson University Cooperative Extension – Growing Herbs
Disclaimer: This article is for informational purposes only and is based on general research, personal experience, and insights gathered from reputable gardening sources. It is not intended to serve as a substitute for professional advice. Gardening conditions, climates, and individual circumstances can vary widely, so results may differ from those described. Always consult a qualified horticulturist, agricultural extension service, or other professional for personalized guidance tailored to your specific situation. The author and publisher are not responsible for any adverse outcomes resulting from the application of the information provided in this content.
This content is for informational purposes only and not a substitute for professional advice.