Have you ever dreamed of having a steady supply of fresh mint right at your fingertips, no matter the season? Well, planting mint seeds indoors can make that dream a reality. It’s not just about adding a burst of flavor to your teas, mojitos, or salads—it’s also about the sheer joy of nurturing a plant from a tiny seed to a thriving herb. I’ve been growing mint indoors for years, and let me tell you, there’s nothing quite like snipping a few leaves straight from your windowsill on a chilly winter morning. If you’re ready to plant mint seeds indoors easily, stick with me. I’m going to walk you through every step, sprinkle in some personal tips, and help you avoid the pitfalls I stumbled into when I first started.
Why Plant Mint Seeds Indoors?
Let’s kick things off with the “why.” Mint is one of those herbs that thrives in controlled environments, and growing it indoors gives you a front-row seat to its magic. Unlike outdoor gardening, where you’re at the mercy of unpredictable weather or pesky pests, indoor mint lets you play Mother Nature. You control the light, water, and temperature. Plus, mint’s vigorous growth can be a bit of a double-edged sword outdoors—it spreads like wildfire and can take over your garden if you’re not careful. Indoors, you can keep it in check with a simple pot. And honestly, who doesn’t love the idea of fresh herbs year-round without trudging through snow or mud?
Another perk? Starting from seeds is budget-friendly. A packet of mint seeds costs a fraction of what you’d pay for a mature plant at a nursery. Sure, it takes a little patience, but the reward of seeing those first tiny green shoots pop up is worth its weight in gold. I remember the first time I saw my spearmint seeds sprout after a couple of weeks of waiting—it felt like I’d won the gardening lottery!
Choosing the Right Mint Seeds for Indoor Growing
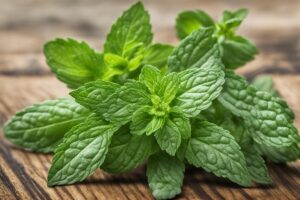
Before you rush out to buy seeds, let’s talk variety. Not all mints are created equal, and some are better suited for indoor life than others. Spearmint and peppermint are the heavy hitters—easy to grow, aromatic, and versatile for cooking. If you’re feeling adventurous, you might try chocolate mint (yes, it smells like a dessert) or apple mint for a fruity twist. I’ve had great success with spearmint indoors; its milder flavor pairs beautifully with everything from lamb to lemonade.
Here’s a pro tip: always buy seeds from a reputable source. Look for organic or non-GMO options if that’s your vibe, and check reviews to ensure high germination rates. I once made the mistake of grabbing a cheap packet from a discount store, only to wait weeks with zero sprouts. Lesson learned—quality matters. If you’re unsure where to start, local garden centers or trusted online retailers like Baker Creek Heirloom Seeds are a safe bet.
Setting Up the Perfect Indoor Environment
Now, let’s get down to brass tacks: creating the ideal setup to plant mint seeds indoors easily. Mint isn’t overly fussy, but it does have a few non-negotiables. First, light. Mint craves at least 6-8 hours of bright, indirect sunlight daily. A south-facing windowsill is gold, but if your home is more cave than greenhouse, don’t sweat it. I’ve used a cheap grow light from Amazon with fantastic results—just set it on a timer for 12-14 hours a day, and you’re golden.
Next up, containers. Go for pots with drainage holes to prevent soggy soil—mint hates wet feet. I’ve repurposed old terracotta pots, but even a plastic container with holes poked in the bottom works in a pinch. Fill it with a well-draining potting mix; I like to mix in a bit of perlite or sand to keep things airy. And don’t forget a tray underneath to catch drips—trust me, your countertop will thank you after the inevitable overwatering mishap I had early on.
Temperature-wise, aim for 65-70°F (18-21°C). Mint isn’t a diva, but it doesn’t love extremes. Keep it away from drafty windows or heat vents. Imagine you’re setting up a cozy little nook for a friend—that’s the vibe you’re going for.
Step-by-Step Guide to Planting Mint Seeds Indoors
Ready to get your hands dirty? Here’s how to plant mint seeds indoors easily, broken down into bite-sized steps. I’ve refined this process over countless trials (and a few errors), so you can skip the guesswork.
- Prepare Your Seeds: Mint seeds are tiny, so handle with care. Some gardeners swear by soaking them in water for 24 hours to speed up germination, but I’ve had success without this step. Your call.
- Sow the Seeds: Fill your pot with potting mix, leaving about half an inch from the top. Sprinkle 2-3 seeds per pot on the surface—don’t bury them deep; a light dusting of soil (about ¼ inch) is plenty. Mint needs light to germinate.
- Water Gently: Use a spray bottle to mist the soil until it’s damp, not drenched. Cover the pot with plastic wrap or a clear lid to lock in humidity. I’ve used old takeout container lids for this—recycling for the win!
- Wait Patiently: Place the pot in a warm spot with indirect light. Germination can take 7-14 days, sometimes longer. Check daily for sprouts, and keep the soil moist but not soggy.
- Thin the Seedlings: Once you see true leaves (the second set after the baby leaves), pick the strongest seedling per pot and snip the others. It feels ruthless, but overcrowding stunts growth—I learned this the hard way.
From there, it’s all about maintenance. Water when the top inch of soil feels dry, and rotate the pot every few days for even light exposure. Easy peasy, right?
Common Challenges and How to Tackle Them
Let’s be real—growing mint indoors isn’t always a walk in the park. I’ve faced my fair share of hiccups, and I’m betting you might too. One biggie is overwatering. Mint likes moisture, but too much leads to root rot. Been there, done that. Stick your finger in the soil—if it’s still wet, hold off on the watering can. Another issue? Leggy plants. If your mint looks like it’s stretching for the sky, it’s begging for more light. Move it closer to a window or crank up that grow light.
Pests can sneak indoors too. I once had a tiny aphid invasion—yuck. A quick fix is to mix a teaspoon of dish soap with a quart of water, dip a cloth in, and wipe down the leaves. Works like a charm. And if germination feels like it’s taking forever, don’t despair. Mint seeds can be slowpokes. Give them time, and double-check your setup for warmth and moisture.
Harvesting and Enjoying Your Indoor Mint
After all that TLC, the payoff is sweet. You can start harvesting mint once it’s about 6 inches tall—usually 6-8 weeks after planting. Snip the top leaves with scissors to encourage bushier growth; don’t yank the whole stem. I love tossing fresh mint into iced tea or muddling it for cocktails. Pro tip: harvest in the morning when the oils are strongest for max flavor. And if you’ve got more than you can use, dry the leaves or freeze them in ice cube trays with water—perfect for later.
One last thought: growing mint indoors isn’t just practical; it’s a mood booster. There’s something therapeutic about tending to a living thing, especially when life gets hectic. Imagine you’re dealing with a stressful workday, and you take a five-minute break to water your mint plant and inhale its refreshing scent. Instant zen. That’s the kind of small win I’m talking about.
References
- University of Minnesota Extension – Growing Mint
- Missouri Botanical Garden – Mentha spicata (Spearmint)
- Penn State Extension – Growing Herbs Indoors
- Royal Horticultural Society – Growing Mint
- Clemson University Cooperative Extension – Growing Herbs Indoors
Disclaimer: This article is for informational purposes only, based on general research and personal experience. It is not intended to serve as a substitute for professional advice. Gardening conditions, plant health, and individual circumstances can vary widely, so results may differ from those described. Always consult a qualified professional, such as a horticulturist or local extension service, for personalized guidance tailored to your specific situation. The author and publisher are not responsible for any adverse effects or consequences resulting from the application of the information provided in this content.
This content is for informational purposes only and not a substitute for professional advice.