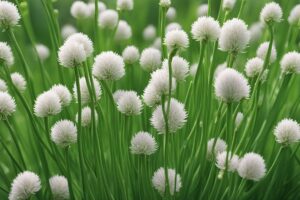
Have you ever dreamed of snipping fresh chives right from your windowsill to sprinkle over a creamy potato soup or a fluffy omelet? If so, you’re in for a treat. Planting chive seeds indoors is not only doable but also incredibly rewarding, even if you’re not blessed with a green thumb. Chives, with their mild onion flavor and vibrant green shoots, are a low-maintenance herb that can thrive in the cozy confines of your home. I’ve been growing herbs indoors for years, and chives are hands-down one of the easiest to start with. In this guide, I’ll walk you through every step to plant chive seeds indoors easily, sharing tips I’ve picked up from trial and error, along with insights from trusted gardening experts. Let’s dive in and get those seeds sprouting!
Why Plant Chive Seeds Indoors?
Starting chives indoors gives you a head start, especially if you live in a region with short growing seasons or unpredictable weather. Imagine you’re dealing with a late spring frost—having your chives already sprouting indoors means you’re not at the mercy of Mother Nature. Plus, indoor growing lets you control light, water, and temperature, which can be a game-changer for germination. I remember the first time I tried growing chives outside; half the seeds didn’t make it due to a sudden cold snap. Indoors, though, I’ve had near-perfect success rates. Beyond practicality, there’s something downright satisfying about watching those tiny green spears poke through the soil while you’re sipping coffee in your kitchen. Chives also don’t need a sprawling garden plot—a small pot on a sunny windowsill does the trick.
Choosing the Right Chive Seeds and Supplies
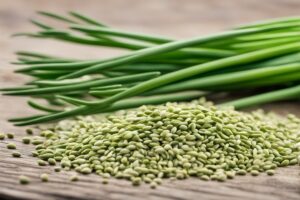
Before you get started, let’s talk seeds and gear. Not all chive seeds are created equal, so opt for a reputable brand or supplier. Look for common chive varieties like ‘Fine Leaved’ or ‘Purly’—they’re hardy and perfect for beginners. I usually grab mine from a local nursery or trusted online seed catalogs like Baker Creek Heirloom Seeds, where quality is a given. You’ll also need a few basics: small pots or seed trays with drainage holes, a good seed-starting mix (not regular potting soil, as it’s too dense), a spray bottle for gentle watering, and plastic wrap or a humidity dome to trap moisture during germination.
Here’s a quick tip from my own mishaps: don’t skimp on the seed-starting mix. The first time I planted chives, I used cheap garden soil, and the seeds struggled to break through. A light, airy mix with vermiculite or perlite makes all the difference for those delicate roots. If you’re curious about specific brands, check recommendations from university extension services—they often list tested products for herb gardening.
Step-by-Step Guide to Planting Chive Seeds Indoors
Ready to get your hands dirty? Planting chive seeds indoors is straightforward, but a little attention to detail goes a long way. Here’s how I do it, step by step, based on years of tweaking my process.
First, fill your pots or trays with the seed-starting mix, leaving about half an inch of space at the top. Lightly moisten the soil with a spray bottle—don’t drench it, or you’ll risk mold. Next, sprinkle the chive seeds on the surface, about 2-3 seeds per inch. Chive seeds are tiny, so don’t bury them deep; just press them gently into the soil or cover them with a whisper-thin layer of mix. Cover the container with plastic wrap or a dome to keep humidity high, and place it in a warm spot, ideally between 60-70°F (15-21°C). I usually set mine on a shelf near a radiator in winter, and they’re happy as clams.
Germination takes about 7-14 days, so be patient. Check daily for moisture—mist the soil if it looks dry. Once you see those little green shoots, remove the cover and move the container to a sunny spot. If you don’t have a south-facing window, a grow light works wonders. I’ve used a simple LED grow light for years, and it’s been a lifesaver during gloomy months. Rotate the pots every few days so the seedlings don’t lean too much toward the light. Easy, right?
Light, Water, and Care Tips for Indoor Chives
Chives are pretty forgiving, but they do need some TLC to thrive indoors. Light is non-negotiable—aim for at least 6-8 hours of bright, indirect sunlight daily. If your home is on the darker side, like mine was when I lived in a north-facing apartment, invest in a grow light. I learned the hard way that skimping on light leads to leggy, weak plants that flop over like tired spaghetti.
Watering is another balancing act. Keep the soil consistently moist but not soggy—overwatering is a silent killer. I use the finger test: stick your finger about an inch into the soil; if it’s dry, give it a drink with your spray bottle or a small watering can. As for feeding, chives aren’t heavy eaters. A diluted liquid fertilizer every 6-8 weeks is plenty. I’ve found that fish emulsion works great, though it smells like a dockyard—fair warning!
One last thing: don’t forget to trim. Once your chives reach about 6 inches tall, snip off the tops to encourage bushier growth. The first time I harvested mine, I felt like a pro chef, tossing fresh chives into every dish for a week. It’s a small win, but it feels huge.
Common Challenges and How to Tackle Them
Even with the best intentions, things can go awry. Let’s troubleshoot some common hiccups when planting chive seeds indoors. Ever noticed your seeds just won’t sprout? Poor germination often comes down to temperature or old seeds. Chives like it warm, so if your home is chilly, consider a seedling heat mat. I didn’t believe in them until I tried one during a cold snap—germination went from spotty to near 100%. Also, check the seed packet’s date; seeds older than a year or two lose viability. If in doubt, do a quick germination test by wrapping a few seeds in a damp paper towel for a week to see if they sprout.
Another issue is pests, even indoors. Gnats and aphids can sneak in through open windows or hitch a ride on other plants. I’ve dealt with gnats before, and a sticky trap near the pots cleared them out in days. For aphids, a gentle soap-water spray does the trick—just don’t overdo it. And if your chives start yellowing, it’s usually overwatering or poor drainage. Ease up on the water and ensure your pots have holes. These little fixes can save your crop from going south.
Transplanting or Keeping Indoors Long-Term
Once your chives are a few inches tall, you’ve got a choice: keep them indoors indefinitely or transplant them outside when the weather warms up. If you’re like me and love having fresh herbs at arm’s reach, a permanent indoor spot works fine. Just repot them into a slightly larger container every year or so to refresh the soil. I’ve got a pot of chives that’s been on my kitchen counter for three years now, still going strong with minimal fuss.
If you’re transplanting, wait until after the last frost and harden them off first—gradually expose them to outdoor conditions over a week to avoid shock. I made the mistake of skipping this once, and my poor chives wilted within days. According to the University of Minnesota Extension, hardening off is crucial for tender indoor plants, and I can vouch for that from experience. Pick a spot outside with partial shade and well-drained soil, and they’ll adapt in no time.
References
- University of Minnesota Extension – Growing Herbs
- Penn State Extension – Starting Herbs from Seed
- Missouri Botanical Garden – Allium schoenoprasum (Chives)
- Clemson University Cooperative Extension – Growing Herbs
- Royal Horticultural Society – How to Grow Chives
Disclaimer: This article is for informational purposes only, based on general research and personal experience. It is not intended to serve as a substitute for professional advice. Gardening conditions, seed quality, and individual environments can vary widely, and results may differ from those described. Always consult a qualified professional, such as a local horticulturist or extension service, for personalized guidance tailored to your specific situation. The author and publisher are not responsible for any adverse effects or consequences resulting from the application of the information provided in this content.
This content is for informational purposes only and not a substitute for professional advice.