There’s something downright magical about watching a tiny seed transform into a vibrant bloom, isn’t there? If you’ve ever felt the itch to brighten up your garden with bursts of color, you’re in the right place. Cultivating annual flower seeds outdoors is not just a rewarding hobby—it’s a way to connect with nature, boost your curb appeal, and even save a few bucks compared to buying mature plants. In this guide, we’re diving deep into the art and science of growing annuals from seed right in your backyard. Whether you’re a green thumb or a nervous newbie, I’ve got tips, tricks, and hard-earned lessons to share that’ll help you sow, grow, and show off a garden full of life.
Why Choose to Cultivate Annual Flower Seeds Outdoors?
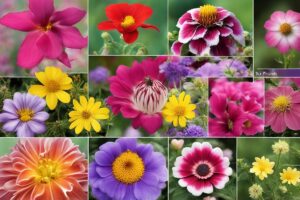
Let’s kick things off with the ‘why.’ Annual flowers—think marigolds, zinnias, or cosmos—are plants that complete their life cycle in a single growing season. They sprout, bloom, set seed, and bid farewell all in one year. So, why go through the effort of starting from seed outdoors instead of grabbing seedlings from the nursery? For starters, it’s a fraction of the cost. A packet of seeds can yield dozens of plants for the price of just one potted flower. Plus, there’s a certain pride in nurturing something from scratch. I remember the first time I sowed sunflower seeds in my patchy backyard—watching those towering giants emerge felt like I’d unlocked a secret superpower.
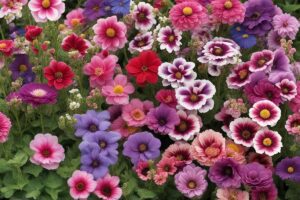
Beyond the personal satisfaction, cultivating annual flower seeds outdoors gives you control over variety. Nurseries often stock the same old standbys, but seed catalogs? They’re a treasure trove of unique colors, shapes, and heirloom types you won’t find elsewhere. And let’s not forget the environmental perk—starting seeds outdoors cuts down on plastic pots and transport emissions tied to store-bought plants. It’s a win-win, if you ask me.
Picking the Right Annual Flower Seeds for Your Outdoor Space
Not all annuals are created equal when it comes to outdoor cultivation. Before you rip open that seed packet, take a hard look at your growing conditions. Are you dealing with scorching summers or a short growing season? Is your yard a sun-soaked paradise or more of a shady retreat? Matching seeds to your environment is half the battle. For sunny spots, I’ve had fantastic luck with zinnias—their bold blooms thrive in heat and don’t fuss much. If shade is your challenge, try impatiens; they’ve brightened up the dim corners of my garden for years.
Another tip? Check your USDA Hardiness Zone (or equivalent if you’re outside the U.S.) to nail down your frost dates. Most annuals like marigolds or nasturtiums need to be sown after the last frost in spring for direct outdoor planting. If you’re itching to start earlier, some seeds can handle a light chill—sweet peas, for instance, don’t mind a cool start. And don’t overlook bloom time. Mixing quick bloomers like cosmos (6-8 weeks to flowers) with slower ones like asters ensures your garden isn’t a one-hit wonder.
Preparing Your Outdoor Plot for Seed Sowing
Imagine you’re setting the stage for a grand performance—your soil is the star, and it better be ready to shine. Cultivating annual flower seeds outdoors starts with prepping the ground. First, clear out weeds, rocks, and debris. I learned this the hard way when a stubborn dandelion root sabotaged my first batch of petunias. Next, test your soil. Most annuals prefer well-draining, loamy soil with a pH between 6.0 and 7.0. If your dirt’s more clay than castle, mix in some compost or sand to loosen it up. I usually toss in a few bags of organic matter from my local garden center—it’s like giving your soil a gourmet meal.
Don’t skimp on location either. Most annuals crave at least 6 hours of direct sunlight, so scope out a spot that isn’t shadowed by trees or buildings. And here’s a pro tip: rake the soil smooth after amending it. A fine, even surface helps tiny seeds settle in without getting lost in clumps. If you’re working with a small space, raised beds or containers work wonders too—just make sure they’ve got drainage holes to avoid waterlogged roots.
Sowing Techniques to Successfully Cultivate Annual Flower Seeds Outdoors
Now for the fun part—getting those seeds in the ground! Timing is everything when you cultivate annual flower seeds outdoors. Check the seed packet for specifics, but as a rule of thumb, wait until the soil warms up to at least 60°F (15°C) for most varieties. I’ve made the mistake of sowing too early in chilly April soil, only to watch my poor seeds rot before they had a chance. Use a soil thermometer if you’re unsure—it’s a cheap tool that saves heartache.
How deep to plant? That depends on the seed. Tiny ones like poppies need just a light sprinkle of soil over them—barely a whisper—since they need light to germinate. Larger seeds, like sunflowers, can go down an inch or so. Space them out as directed; overcrowding is a recipe for weak, leggy plants. After sowing, water gently with a fine mist to avoid washing seeds away. I’ve found a watering can with a rose attachment works best for this delicate job. Then, patience, my friend. Keep the soil moist but not soggy, and in 7-21 days (depending on the flower), you’ll see those first green specks of life.
Caring for Your Annual Seedlings Outdoors
Once your seeds sprout, the real work begins. Cultivating annual flower seeds outdoors means playing both nurturer and protector. Watering is key—aim for consistent moisture, especially in those first few weeks. I’ve got a habit of checking the soil every morning; if the top inch feels dry, it’s time for a drink. But don’t drown them—soggy soil invites fungal issues like damping-off, which wiped out half my marigold patch one rainy spring.
Thinning is another must-do, even if it feels like betraying your babies. If seedlings are too close, they’ll compete for light and nutrients. Snip the weaker ones at soil level to give the strong ones room to thrive. And keep an eye out for pests. Slugs adore tender shoots—I’ve scattered crushed eggshells around my plants as a natural deterrent, and it works like a charm. Fertilizing? Go easy. A balanced, water-soluble fertilizer every 4-6 weeks keeps annuals happy without pushing too much leafy growth over flowers.
Troubleshooting Common Challenges When Growing Annuals Outdoors
Let’s be real—things don’t always go as planned. Maybe your seeds aren’t germinating, or your plants look more pitiful than pretty. What gives? Poor germination often ties back to soil temperature or moisture. If it’s too cold or too dry, seeds just won’t wake up. I’ve had batches of cosmos sit dormant until I moved them to a sunnier, warmer spot. If damping-off is your nemesis, improve air circulation and avoid overwatering—trust me, I’ve lost enough seedlings to this to know the drill.
Yellowing leaves might scream nutrient deficiency or overwatering. Test your soil if you can; a simple kit from the hardware store can point you to the fix. And if blooms are sparse, it could be too much shade or nitrogen-heavy fertilizer. Cut back on the feed and double-check sunlight hours. Gardening is as much problem-solving as it is planting, but each hiccup teaches you something new. Isn’t that half the fun?
References
- University of Minnesota Extension – Growing Annual Flowers from Seed
- Colorado State University Extension – Annuals
- Missouri Botanical Garden – Annuals Care Guide
- University of Illinois Extension – Annual Flowers
- Royal Horticultural Society – Growing Annuals
Disclaimer: This article is for informational purposes only, based on general research and personal experience in gardening. It is not intended to serve as a substitute for professional advice. Gardening conditions, soil types, and plant needs can vary widely based on location and specific circumstances, so results may differ from those described. Always consult a qualified horticulturist, local extension service, or other professional for personalized guidance tailored to your unique situation. The author and publisher are not responsible for any adverse effects or damages resulting from the application of the information provided in this content.
This content is for informational purposes only and not a substitute for professional advice.