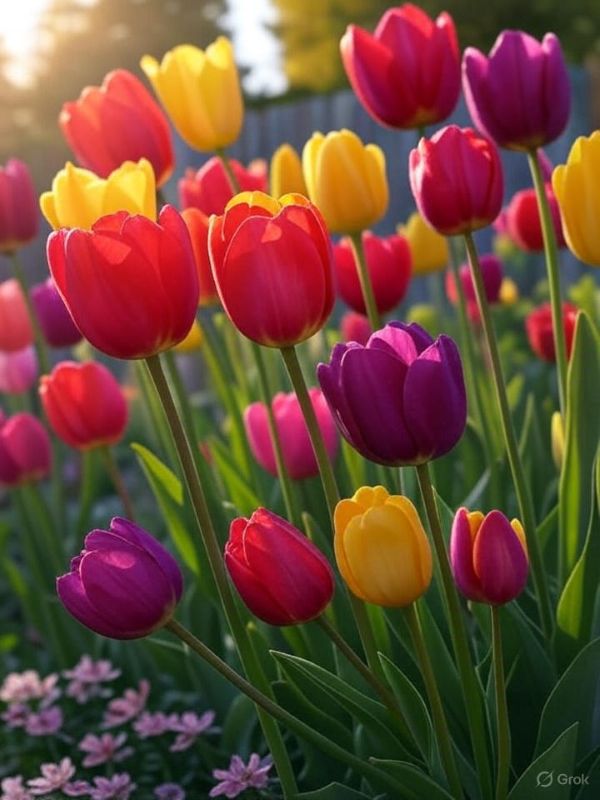
Ahh, tulips—those iconic harbingers of spring that can turn any garden into a kaleidoscope of color. If you’ve ever dreamed of a yard bursting with vibrant tulips, you’re in the right place. Planting tulips isn’t just about sticking bulbs in the ground and hoping for the best; it’s an art form that requires a bit of know-how, patience, and a sprinkle of love. In this guide, I’m diving deep into planting tips for vibrant tulips, sharing insights I’ve gathered over years of trial and error in my own garden, along with expert-backed advice to ensure your blooms steal the show come springtime. Whether you’re a seasoned gardener or a complete newbie, I’ve got you covered with actionable steps, personal anecdotes, and a few tricks up my sleeve to help your tulips thrive.
Disclaimer: This article is for informational purposes only, based on general research and personal experience—it’s not a substitute for professional horticultural or medical advice, diagnosis, or treatment. While tulips are generally safe to plant and enjoy, some individuals may have allergic reactions to handling bulbs or pollen, and certain varieties may be toxic to pets if ingested. Always consult a qualified healthcare provider or veterinarian for personalized guidance if you have concerns about allergies or pet safety. Additionally, if you’re unsure about soil conditions or local planting regulations, consider reaching out to a local gardening expert or extension service for tailored advice.
Why Timing Is Everything for Planting Tulips
Let’s kick things off with timing—arguably the most critical factor when planting tulips for vibrant results. Tulip bulbs need a period of cold dormancy to bloom successfully, which is why fall is the sweet spot for planting in most climates. Ideally, you’ll want to get those bulbs in the ground about 6 to 8 weeks before the first hard frost, typically between September and November in the Northern Hemisphere. Why so specific? Well, planting too early risks the bulbs sprouting prematurely in warm soil, while planting too late might not give them enough time to establish roots before winter hits.
I learned this the hard way a few years back. Eager to get a head start, I planted a batch of ‘Queen of Night’ tulips in late August during an unseasonably warm spell. Big mistake. Half of them sprouted early, only to wither when the cold finally arrived. Now, I always check my local frost dates—easily found through resources like the USDA Plant Hardiness Zone Map—and aim for that mid-fall window. Trust me, a little patience pays off when you see those sturdy stems popping up in spring.
Choosing the Right Location for Maximum Impact
Ever wonder why some tulip displays look like they belong on a postcard while others fizzle out? Location, location, location! Tulips crave full sun—at least 6 hours a day—to produce those bold, vibrant blooms we all love. They’re not divas, though; they can tolerate a bit of afternoon shade in hotter climates. The key is to pick a spot with well-draining soil. Tulips hate “wet feet,” as soggy conditions can lead to bulb rot faster than you can say “spring garden.”
Imagine you’re dealing with a yard that’s more clay than loam. Been there, done that. In my first home, the soil was so heavy I could’ve made pottery with it. To fix this, I mixed in some sand and compost to improve drainage before planting my bulbs. If you’re in a similar boat, consider raised beds as an alternative—they give you full control over the soil mix. Also, think about aesthetics. Plant tulips near walkways or patios where their colors can pop, or group them in clusters of 10 or more for a dramatic effect. For more ideas on garden design, check out our post on Creative Garden Layouts for Spring Blooms.
Soil Prep: Setting the Stage for Vibrant Tulips
Let’s talk dirt—literally. Preparing your soil is like laying a strong foundation for a house; skip this step, and your tulips won’t stand a chance. Tulips prefer a slightly acidic to neutral pH (6.0 to 7.0), and they thrive in loose, fertile soil. Before planting, I always test my soil with a simple kit from the local garden center. If the pH is off, you can amend it with lime to raise it or sulfur to lower it, but go slow—over-correcting can do more harm than good.
Here’s a tip from my own playbook: mix in some organic matter like compost or well-rotted manure a few weeks before planting. This not only boosts nutrients but also improves soil structure. And don’t skimp on depth. Dig down about 12 inches to loosen compacted soil, ensuring those roots have room to stretch. One spring, I paired this prep with a slow-release bulb fertilizer (look for a 10-10-10 mix), and my tulips were so vibrant, my neighbors thought I’d hired a professional landscaper! For more on soil health, see our guide on Testing and Amending Garden Soil.
Planting Depth and Spacing: Getting It Just Right
Now, onto the nitty-gritty of planting. How deep should you go? A general rule of thumb is to plant tulip bulbs at a depth of 6 to 8 inches, measured from the base of the bulb to the soil surface. This protects them from temperature swings and hungry critters. Got smaller bulbs or species tulips? You can get away with 4 to 6 inches. Spacing-wise, aim for 4 to 6 inches apart to give each bulb room to shine without overcrowding.
Here’s a little story: my first attempt at planting tulips was a bit of a clown show. I planted them too shallow, thinking deeper meant more work. Come spring, half of them tipped over because their roots couldn’t anchor properly. Lesson learned. Now, I use a bulb planter tool—it’s a game-changer for getting consistent depth. Oh, and always point the bulb’s tip upward; it’s the growing end, and planting it upside down is like asking a fish to swim backward. If you’re curious about tools that make planting easier, check out our roundup of Must-Have Gardening Tools for Beginners.
Aftercare: Nurturing Your Tulips to Bloom
Once your bulbs are in the ground, the work isn’t over—sorry to burst your bubble! Aftercare is crucial for vibrant tulips. Water them thoroughly right after planting to help settle the soil, but don’t overdo it. Tulips don’t need much moisture during dormancy, so only water again if the soil is bone-dry during a fall drought. Come spring, when shoots emerge, keep the soil consistently moist but not waterlogged.
One thing I’ve found invaluable is mulching. A 2-inch layer of straw or shredded bark over the planting area insulates the bulbs from harsh winter temps and keeps weeds at bay. Just don’t pile it on too thick, or you’ll trap too much moisture. And here’s a pro tip: after the blooms fade, resist the urge to cut back the foliage right away. Let it die back naturally to feed the bulb for next year’s show. I made the mistake of tidying up too soon once, and my tulips barely returned the following season. Live and learn, right?
Pest and Disease Prevention: Protecting Your Investment
Nothing’s more heartbreaking than watching your tulips get munched on by pests or wilt from disease. Squirrels, deer, and voles love tulip bulbs as much as we love the flowers, often digging them up before they even get a chance. To deter these critters, I’ve had luck with planting bulbs in wire mesh cages or sprinkling cayenne pepper around the area—though you’ll need to reapply after rain. For deer, consider companion planting with daffodils, which they tend to avoid due to their toxicity.
Diseases like bulb rot and fungal issues can also creep in, especially in poorly drained soil. Rotate your planting spots each year to prevent buildup of pathogens, and inspect bulbs before planting—toss any that feel soft or show mold. I once lost a whole batch to rot because I ignored a squishy bulb, thinking it’d be fine. Spoiler: it wasn’t. Prevention is always better than cure, so keep an eye out and act fast if something looks off.
References
- Old Farmer’s Almanac: How to Grow Tulips – A comprehensive guide on tulip planting and care with regional tips.
- USDA: Gardening Resources – Official resource for understanding plant hardiness zones and soil health.
- Royal Horticultural Society: Tulip Growing Guide – Expert advice on tulip cultivation from a globally recognized authority.
- University of Minnesota Extension: Growing Tulips – Research-based insights on tulip care and pest management.
This content is for informational purposes only and not a substitute for professional advice.