There’s something magical about a garden bursting with lilies, isn’t there? Their bold colors, elegant shapes, and intoxicating fragrances can transform any outdoor space into a living masterpiece. If you’re eager to master the art of growing vibrant lily varieties, you’ve come to the right place. I’ve spent years experimenting with these stunning flowers, from the towering Orientals to the petite Asiatics, and I’m thrilled to share my hard-earned tips and tricks. Whether you’re a seasoned gardener or just dipping your toes into the world of bulbs, this guide will walk you through everything you need to know to cultivate lilies that stop people in their tracks. Let’s dig in—pun intended!
Understanding Lily Varieties: Which Ones to Grow?
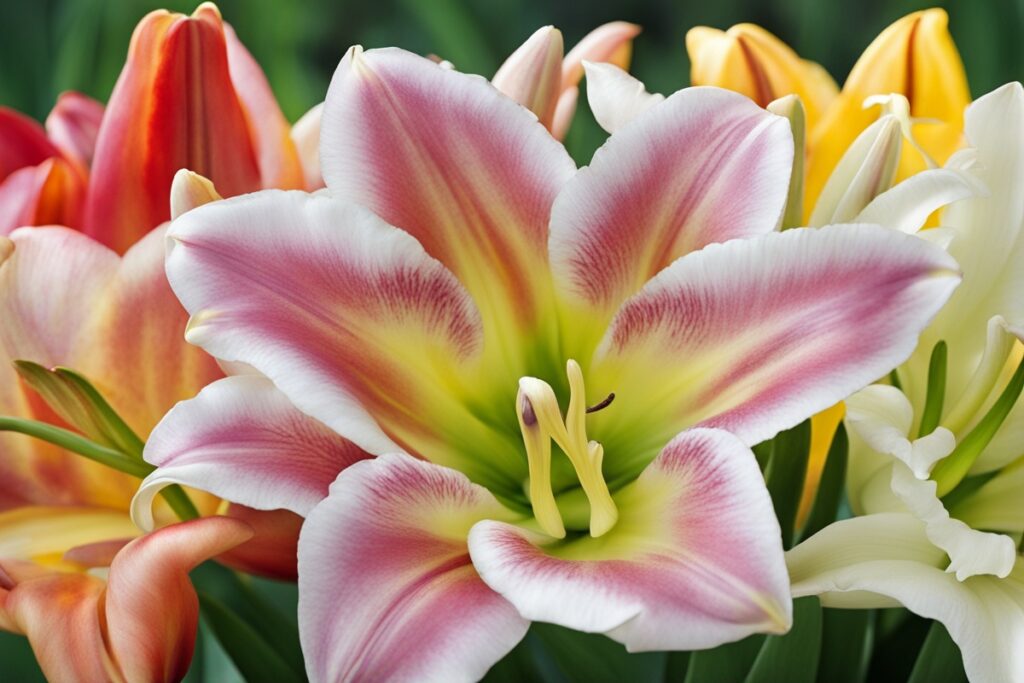
Lilies come in a dazzling array of types, each with its own personality and growing needs. Before you start planting, it’s worth getting to know the main players. Asiatic lilies, for instance, are the tough cookies of the bunch—hardy, easy to grow, and available in a rainbow of colors. They bloom early in the summer and thrive in a variety of climates. On the other hand, Oriental lilies are the divas of the garden, with their large, fragrant blooms and a preference for slightly acidic soil. Then there are Trumpet lilies, which can reach towering heights of up to 6 feet, and the delicate Martagons, perfect for shaded woodland gardens.
Choosing the right variety depends on your climate, soil, and aesthetic goals. I remember the first time I planted Orientals in my backyard; I was mesmerized by their scent but quickly learned they needed more pampering than the Asiatics I’d grown before. My advice? Start with a mix of varieties to see what thrives in your space. Not sure where to begin? Ask yourself: Do I want a bold statement or a subtle charm? Your answer will guide your selection as you embark on growing vibrant lily varieties.
Preparing the Perfect Spot for Your Lilies
Location, location, location—that’s the mantra for growing vibrant lily varieties. Most lilies crave at least 6 hours of sunlight daily, though some, like Martagons, are happy with dappled shade. Drainage is another non-negotiable. Lilies hate “wet feet,” as soggy soil can lead to bulb rot faster than you can say “garden disaster.” I learned this the hard way when I planted a batch of Trumpets in a low-lying area of my garden after a rainy spring. Half of them didn’t make it through the season. Now, I always test drainage by digging a hole, filling it with water, and seeing how quickly it disappears. If it lingers for more than a few hours, I amend the soil with compost or sand to improve it.
Soil pH matters too. Most lilies prefer a slightly acidic to neutral range (6.0–7.0). Grab a simple soil test kit from your local garden center to check yours—it’s a small investment for big results. And don’t skimp on organic matter. Mixing in well-rotted manure or compost before planting gives your bulbs the nutrient boost they need to shine. Imagine you’re tucking your lilies into a cozy, nutrient-rich bed. That’s the vibe you’re going for!
Planting Lily Bulbs: Timing and Technique
Timing is everything when it comes to planting lily bulbs. Fall is ideal for most varieties, as it allows the bulbs to establish roots before winter. Aim for 6–8 weeks before the first hard frost in your area. If you miss that window, early spring works too, though you might see blooms a bit later. I’ve planted both ways, and while fall planting often yields stronger plants, spring planting saved me when I impulse-bought a batch of discounted bulbs at a local nursery.
Now, let’s talk technique. Plant bulbs at a depth of about three times their height—usually 6–8 inches for larger bulbs. Space them 12–18 inches apart to give those roots room to breathe. Here’s a little trick I picked up over the years: position the bulbs with their “basal plate” (the flat bottom where roots grow) facing down, and angle them slightly to prevent water from pooling on top. Cover with soil, water gently, and mulch with a 2–3 inch layer of straw or bark to insulate them. Growing vibrant lily varieties starts with this foundation, so don’t rush the process. Take your time, and you’ll be rewarded with sturdy stems and dazzling blooms.
Caring for Lilies: Watering, Feeding, and Pest Control
Once your lilies are in the ground, consistent care is key to growing vibrant lily varieties. Watering should be regular but not excessive—aim for about an inch per week, more during dry spells. I use the “finger test”: stick your finger into the soil near the base of the plant. If it feels dry an inch down, it’s time to water. Overwatering can be just as disastrous as underwatering, so trust your instincts and observe how your plants respond.
Feeding is another piece of the puzzle. A balanced, slow-release fertilizer (like a 10-10-10) applied in early spring as shoots emerge works wonders. I also like to top-dress with compost mid-season for an extra boost. But here’s a cautionary tale: don’t over-fertilize. I once got a little heavy-handed with a nitrogen-rich mix, and while my lilies grew tall and lush, they flopped over without enough strength in their stems. Balance is everything.
Pests and diseases can throw a wrench in your plans if you’re not vigilant. Lily beetles, with their bright red shells, are notorious for munching on leaves and buds. I’ve spent many a morning hand-picking these critters off my plants (wear gloves—it’s oddly satisfying!). Neem oil or insecticidal soap can help if infestations get out of hand. Also, keep an eye out for botrytis, a gray mold that thrives in humid conditions. Good air circulation and avoiding overhead watering can prevent it. If you spot trouble, act fast—your lilies will thank you.
Encouraging Repeat Blooms and Long-Term Success
Want your lilies to come back year after year, stronger and more vibrant? It’s not just wishful thinking—it’s doable with a little TLC. After blooming, resist the urge to cut back the foliage right away. Let it die back naturally so the plant can store energy in the bulb for next season. I made this mistake early on, tidying up too soon, and wondered why my lilies looked lackluster the following year. Lesson learned!
Dividing bulbs every 3–4 years also keeps them healthy. Overcrowded bulbs compete for nutrients, leading to smaller blooms. Dig them up in fall, separate the offsets (baby bulbs), and replant them elsewhere. It’s like giving your garden a fresh start. And here’s a pro tip: mark your lily spots with small stakes or tags. I can’t tell you how many times I’ve accidentally dug into dormant bulbs while planting something else. Save yourself the headache!
Lastly, consider companion planting to enhance your lily display. Pairing them with low-growing perennials like catmint or hardy geraniums not only hides fading foliage but also creates a layered, dynamic look. Growing vibrant lily varieties isn’t just about the lilies themselves—it’s about crafting a garden story that unfolds with every season.
Troubleshooting Common Lily Growing Challenges
Even with the best intentions, things can go awry when growing vibrant lily varieties. Yellowing leaves, stunted growth, or no blooms at all—sound familiar? Let’s troubleshoot. Yellowing often signals overwatering or poor drainage. Check the soil and adjust accordingly. If growth is stunted, it might be a nutrient deficiency or too much shade. A soil test can pinpoint the issue, and relocating to a sunnier spot might be the fix.
No blooms can be a real heartbreaker. This usually points to young bulbs (give them a year or two to mature), insufficient sunlight, or stress from transplanting. I once moved a batch of Asiatics mid-season on a whim, and they sulked for an entire year. Patience is your friend here. If all else fails, consult local gardening forums or extension services—they often have region-specific advice that’s pure gold.
References
- Royal Horticultural Society – Growing Lilies Guide
- University of Minnesota Extension – Growing Lilies
- Gardeners’ World – How to Grow Lilies
Disclaimer: This article is for informational purposes only, based on general research and personal experience. It is not intended as a substitute for professional horticultural advice. Gardening conditions vary widely by region, soil type, and climate, so results may differ. Always consult a qualified professional, such as a local horticulturist or extension service, for personalized guidance tailored to your specific garden environment. Additionally, while care has been taken to ensure the accuracy of the information provided, the author and publisher are not responsible for any loss, damage, or injury resulting from the application of the advice shared in this post.
This content is for informational purposes only and not a substitute for professional advice.