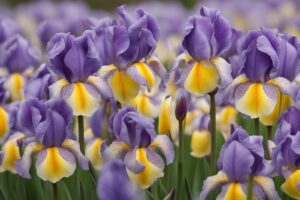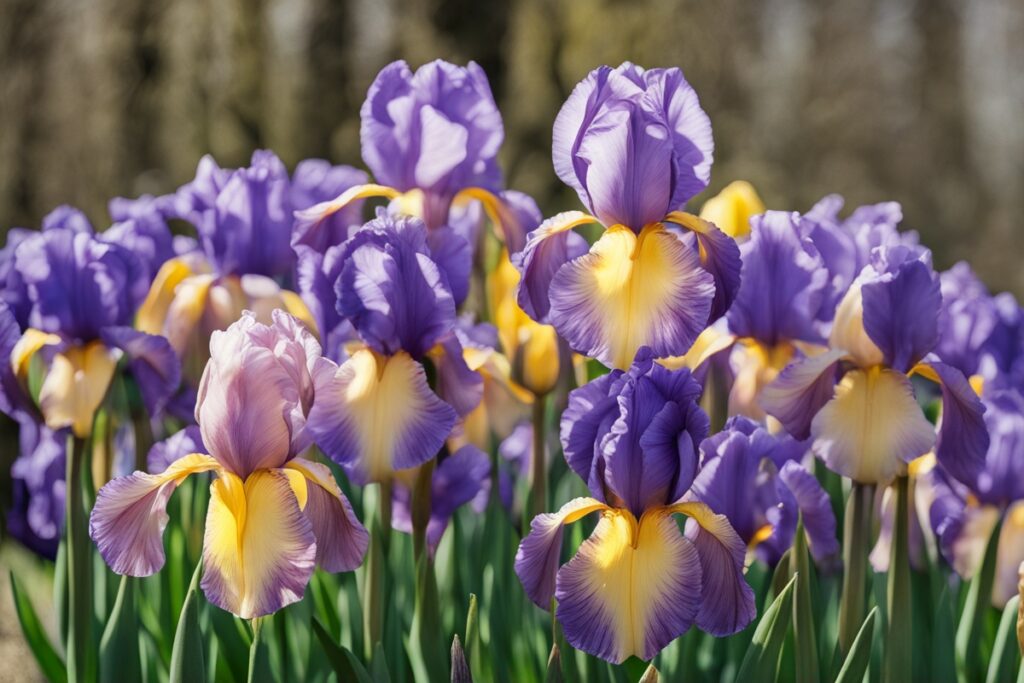
There’s something magical about watching Dutch Iris bulbs burst into vibrant blooms in the spring, isn’t there? Their elegant, sword-like foliage and striking flowers in shades of purple, blue, yellow, and white can transform any garden into a painter’s canvas. If you’ve ever thought growing these beauties might be out of your league, think again. With a little know-how and some tender loving care, you can nurture Dutch Iris bulbs easily and enjoy a stunning display year after year. I’ve spent years tinkering with these bulbs in my own backyard, learning through trial and error what works best, and I’m excited to share those insights with you. Let’s dig into the essentials of cultivating Dutch Iris bulbs, from planting to long-term care, with practical tips that’ll make the process a breeze.
Why Choose Dutch Iris Bulbs for Your Garden?
Dutch Iris bulbs, scientifically known as Iris x hollandica, are a hybrid variety celebrated for their hardiness and striking appearance. Unlike their water-loving cousins, the bearded irises, Dutch Irises are incredibly adaptable and low-maintenance, making them perfect for beginners or busy gardeners. I remember the first time I planted them—honestly, I was skeptical. Could something so gorgeous really be this easy to grow? Turns out, yes! They thrive in a variety of climates (USDA Zones 5-9), resist most pests, and don’t demand constant attention. Plus, their blooms make fantastic cut flowers for indoor arrangements. If you’re looking to add a pop of color without breaking a sweat, these bulbs are your ticket.
Timing and Preparation: Setting the Stage for Success
Timing is everything when it comes to planting Dutch Iris bulbs. Fall is the sweet spot—ideally between September and early November—before the ground freezes. This gives the bulbs a chance to establish roots before winter sets in. I’ve made the mistake of planting too late in the season, and let me tell you, the results were underwhelming. Barely any blooms the next spring! So, don’t procrastinate. Before you even grab your trowel, prepare your soil. Dutch Irises love well-drained, slightly acidic to neutral soil (pH 6.0-7.0). Mix in some compost or aged manure to boost fertility, but avoid heavy, waterlogged earth—think of it as giving your bulbs a comfy bed to rest in. A quick soil test (you can grab kits at most garden centers) can save you headaches down the line.
Planting Dutch Iris Bulbs: A Step-by-Step Guide
Ready to get your hands dirty? Planting Dutch Iris bulbs is straightforward, but a few small details can make a big difference. First, pick a sunny spot—six hours of direct sunlight daily is ideal. I’ve tried growing them in partial shade, and while they survived, the blooms were sparse and leggy. Dig a hole about 4-5 inches deep, and space the bulbs roughly 3-4 inches apart to give them room to breathe. Place the bulb pointy side up (yes, I’ve flipped them upside down before and wondered why nothing grew!). Cover with soil, give them a gentle pat, and water lightly to settle the earth. Here’s a pro tip from my own mishaps: label your planting area. Come spring, you’ll thank yourself when you’re not accidentally digging up bulbs while planting something else.
Watering and Feeding: Striking the Right Balance
Once your Dutch Iris bulbs are in the ground, don’t drown them with love—literally. Overwatering is a common rookie mistake, and I’ve been there. These bulbs hate soggy feet, so water only when the soil feels dry to the touch, especially during their active growth in spring. A good rule of thumb? About an inch of water per week, including rainfall. As for feeding, a balanced fertilizer (like a 10-10-10 mix) applied in early spring as shoots emerge works wonders. But don’t overdo it—too much nitrogen can lead to lush leaves but no flowers. Imagine you’re nurturing a child; a little encouragement goes a long way, but smothering them won’t help anyone.
Dealing with Challenges: Pests, Diseases, and Other Hiccups
While Dutch Irises are pretty tough, they’re not invincible. Have you ever spotted mushy bulbs or yellowing leaves and wondered, “What did I do wrong?” I have. Root rot from poor drainage is a frequent culprit, so always ensure your soil isn’t holding water like a sponge. Pests like iris borers can also sneak in, tunneling into bulbs and wreaking havoc. If you notice wilting or holes, dig up the affected bulbs and dispose of them—don’t compost, as that spreads the problem. A preventative measure I swear by is inspecting bulbs before planting for any soft spots or damage. Fungal issues like leaf spot can pop up in humid conditions, so keep foliage dry by watering at the base. If all else fails, a chat with your local extension service can offer tailored advice. Gardening is a learning curve, after all!
Long-Term Care: Ensuring Blooms Year After Year
Want your Dutch Irises to keep stealing the show season after season? A little aftercare goes a long way. After the flowers fade, resist the urge to cut back the foliage right away. Those green leaves are busy photosynthesizing, storing energy in the bulb for next year’s display. Wait until they turn yellow and die back naturally—usually by late summer. I’ve learned the hard way that impatience here means weaker blooms later. Every few years, consider dividing overcrowded clumps in late summer to rejuvenate them. It’s like giving your plants a fresh start. And if you’re in a colder zone, a layer of mulch over winter can protect bulbs from harsh freezes. Picture yourself tucking them in for a long winter’s nap—sweet, right?
One last nugget of wisdom: Dutch Irises don’t always perennialize as reliably as other bulbs, especially in warmer climates. If blooms dwindle after a couple of years, don’t beat yourself up. Many gardeners, myself included, treat them as annuals and replant fresh bulbs each fall for guaranteed results. It’s a small investment for such a big payoff. According to experts at the University of Missouri Extension, this approach often yields the most consistent blooms in regions with mild winters. So, adapt to your garden’s quirks and enjoy the journey.
References
- University of Missouri Extension – Growing Irises
- University of Minnesota Extension – Growing Irises
- Royal Horticultural Society – Iris Growing Guide
- Missouri Botanical Garden – Iris x hollandica
- Colorado State University Extension – Growing Irises
Disclaimer: This article is for informational purposes only, based on general research and personal experience. It is not intended to serve as a substitute for professional advice. Gardening conditions, climates, and individual circumstances can vary widely, so results may differ from those described. Always consult a qualified horticulturist, local extension service, or other gardening professional for personalized guidance tailored to your specific situation. The author and publisher are not responsible for any adverse effects or damages resulting from the application of the information provided in this content. Use discretion and prioritize safety when implementing any gardening practices.
This content is for informational purposes only and not a substitute for professional advice.