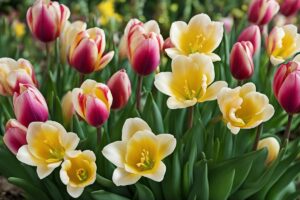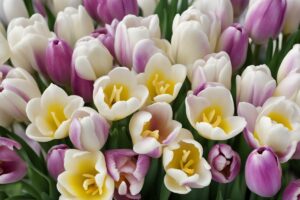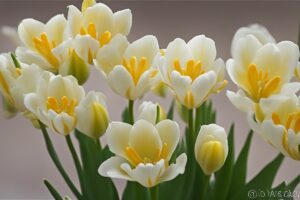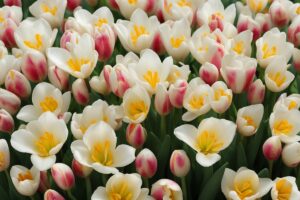
Ahh, freesias. Those delicate, fragrant blooms that can turn any garden into a colorful, sweet-scented paradise. If you’ve ever caught a whiff of their citrusy, floral aroma, you know why gardeners can’t resist them. But here’s the thing—growing vibrant freesias isn’t just about tossing bulbs into the ground and hoping for the best. It takes a bit of know-how, a sprinkle of patience, and some tried-and-true planting tips to get those flowers popping with color and life. Whether you’re a seasoned green thumb or a newbie with dirt under your nails for the first time, I’ve got you covered. Let’s dive into some practical, no-nonsense advice on planting tipsView full post on X (formerly Twitter) for some top-notch tips for vibrant freesias that I’ve picked up over the years.
Why Freesias Deserve a Spot in Your Garden
Freesias are more than just pretty faces. Native to South Africa, these members of the iris family (Iridaceae) are known for their funnel-shaped flowers and an intoxicating fragrance that can rival even the fanciest perfumes. They come in a rainbow of colors—think bright yellows, deep purples, fiery reds, and soft whites—and they’re perfect for borders, containers, or even as cut flowers to brighten up your home. But let’s be real: their beauty doesn’t come without effort. I remember the first time I planted freesia bulbs, back when I was still figuring out my garden. Half of them didn’t even sprout because I didn’t pay attention to timing or soil conditions. Lesson learned! With the right approach, though, you’ll have blooms that’ll make your neighbors green with envy.
Timing Is Everything: When to Plant Freesia Bulbs
One of the golden rules for growing vibrant freesias is getting the timing right. Plant too early, and they might rot in cold, damp soil. Plant too late, and they won’t have enough time to establish before blooming season. If you’re in a mild climate (USDA zones 9-11), fall planting—around September to October—is ideal. For cooler areas (zones 3-8), you’ve got two options: plant in spring after the last frost, or start them indoors 6-8 weeks before moving them outside. I’ve tried both methods, and starting indoors has saved me from many a heartache in unpredictable spring weather. Just imagine you’re dealing with a late frost—those tender shoots don’t stand a chance! Keep an eye on your local frost dates (the Old Farmer’s Almanac is a lifesaver for this) and plan accordingly.
Choosing the Perfect Spot and Soil
Freesias are a bit like Goldilocks—they want conditions that are just right. Full sun is non-negotiable; these plants crave at least 6-8 hours of direct light daily to fuel those vibrant blooms. I’ve seen folks try to skimp on sunlight by planting in partial shade, only to end up with leggy, weak plants and lackluster flowers. Don’t make that mistake. As for soil, well-drained and slightly acidic (pH 6.0-6.5) is the sweet spot. If your garden soil is heavy clay, mix in some sand or organic matter like compost to loosen it up. A few years back, I had a patch of poorly draining soil, and after a rainy spell, half my bulbs turned to mush. Now, I always test drainage by digging a hole, filling it with water, and seeing how fast it disappears. If it’s still there after a couple of hours, I’m amending that soil faster than you can say “root rot.”
Planting Depth and Spacing for Success
Now, let’s talk about getting those bulbs in the ground. Freesia bulbs, or corms to be precise, are small and teardrop-shaped, and they need to be planted about 2-3 inches deep with the pointed end facing up. Space them 3-4 inches apart to give each plant room to breathe—crowding leads to competition for nutrients and poor growth. I like to use a bulb planter to keep things neat; it’s a small investment that saves your back and ensures consistent depth. Pro tip: if you’re planting in rows, stagger them for a natural look. I once planted a small bed of freesias in a grid pattern, and it looked way too stiff—like a military lineup instead of a garden. Live and learn, right?
Watering and Feeding: Keep It Balanced
Freesias aren’t high-maintenance, but they do need a steady hand when it comes to watering and feeding. Keep the soil consistently moist but not soggy during the growing season—think of it as a gentle sip, not a drowning. Overwatering is a common rookie mistake, and I’ve lost a few bulbs to it myself. Once the foliage dies back after blooming, cut back on water to let the corms rest. For feeding, a balanced fertilizer (like a 10-10-10) applied every 4-6 weeks during growth works wonders. I’ve also had great results with a liquid seaweed fertilizer for an extra boost of micronutrients. Just don’t overdo it—too much nitrogen can give you lush leaves but skimpy flowers. Ever seen a plant that’s all foliage and no bloom? It’s like dressing up for a party and forgetting the main event.
Pest and Disease Watch: Protect Your Investment
Like any garden darling, freesias can attract a few uninvited guests. Aphids love to suck the sap from tender stems, while botrytis (gray mold) can creep in during damp, humid conditions. I’ve battled aphids with a strong blast of water from the hose, followed by insecticidal soap if they’re stubborn. For mold, good air circulation and avoiding overhead watering are key. If you spot any funky-looking leaves or stems, snip them off and toss them far from your garden—don’t let disease spread like wildfire. Also, keep an eye out for bulb rot, especially in poorly drained soil. I once lost a whole batch to rot after ignoring drainage issues, and trust me, it’s not a mistake you make twice.
Supporting Tall Stems and Extending Bloom Time
Freesias can grow up to 18-24 inches tall, and those slender stems sometimes need a little help to stay upright, especially in windy spots. I’ve used small bamboo stakes or even a low trellis to keep them from flopping over after a storm. Tie them loosely with garden twine to avoid damaging the stems. And here’s a little trick for longer blooms: deadhead spent flowers regularly. It encourages the plant to focus energy on new buds rather than seed production. Last season, I got an extra two weeks of color just by staying on top of deadheading. Isn’t it amazing how a little snip here and there can make such a difference?
Winter Care and Storage for Next Year
If you’re in a cold climate, freesias aren’t likely to survive winter in the ground unless you’ve got a mild microclimate working in your favor. After the foliage yellows and dies back, dig up the corms, brush off excess soil, and store them in a cool, dry place (around 60-70°F) in a paper bag or perforated container. I’ve used old mesh onion bags for this, and they work like a charm. Check them monthly for mold or shriveling—toss any that look off. Come spring, replant them, and they’ll be ready to shine again. I’ve reused corms for a couple of years this way, though they do lose vigor over time. Ever tried storing bulbs only to find a moldy mess? Yeah, proper airflow is everything.
Ready to grow some show-stopping freesias? With these planting tips for vibrant freesias, you’ve got the blueprint to create a garden bursting with color and scent. Whether it’s picking the perfect spot, nailing the timing, or dodging common pitfalls, a little care goes a long way. If you’re hungry for more bulb-growing wisdom, check out our guides on Planting Daffodils for Spring Color, Tulip Care Essentials, or Bulb Gardening Basics. Happy planting, and may your garden bloom brighter than ever!
References
- Royal Horticultural Society – Growing Freesias
- University of Minnesota Extension – Growing Freesias
- The Old Farmer’s Almanac – Frost Dates Calculator
Disclaimer: This article is for informational purposes only, based on general research and personal experience. It is not intended to serve as a substitute for professional advice. Gardening conditions, climates, and individual circumstances can vary widely, so results may differ. Always consult a qualified horticulturist, local extension service, or other gardening professional for personalized guidance tailored to your specific environment and needs. The information provided here is meant to inspire and educate, but we cannot guarantee outcomes or be held responsible for any issues arising from following this advice.
This content is for informational purposes only and not a substitute for professional advice.