If you’ve ever wandered through a garden in late spring or early summer and been captivated by the striking, spherical blooms of ornamental onions, you’re not alone. These unique plants, part of the Allium family, can transform any landscape with their bold shapes and vibrant colors. But here’s the catch: getting those stunning results starts with knowing the ins and outs of planting them right. Whether you’re a seasoned gardener or just dipping your toes into the world of bulbs, mastering planting tips for ornamental onions is the key to a flourishing display. Let’s dig into the details—pun intended—and explore how to set these beauties up for success.
Why Ornamental Onions Deserve a Spot in Your Garden
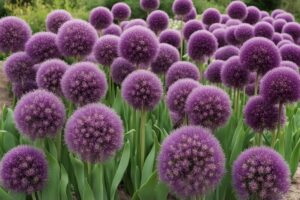
Before we get our hands dirty with planting tips for ornamental onions, let’s talk about why they’re worth the effort. Alliums, often called ornamental onions, are a diverse group of plants that range from the towering Allium giganteum with its massive purple globes to the dainty Allium moly with its cheerful yellow clusters. They’re not just eye candy, though. These bulbs are deer-resistant, drought-tolerant once established, and attract pollinators like bees and butterflies. Plus, they’re perennials, meaning they’ll come back year after year with minimal fuss. Imagine planting them once and enjoying a burst of color every season—doesn’t that sound like a win?
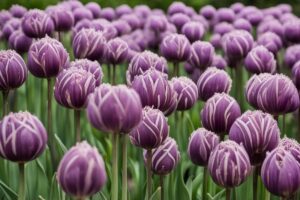
I’ve seen firsthand how Alliums can elevate a garden. A few years back, I planted a cluster of Allium ‘Purple Sensation’ near my front walkway, and it became the talk of the neighborhood. Those deep violet spheres seemed to float above the greenery, and I didn’t have to worry about deer munching on them. But I’ll admit, my first attempt wasn’t perfect—I learned the hard way that timing and soil prep are everything. Let’s break down what I wish I’d known from the start.
Timing Is Everything: When to Plant Ornamental Onions
One of the most critical planting tips for ornamental onions is getting the timing right. These bulbs need to be planted in the fall, ideally between September and November, depending on your climate. Why fall, you ask? It gives the bulbs time to establish roots before winter sets in, ensuring they’re ready to burst into growth come spring. If you plant too late, you risk weak growth or no blooms at all. I made this mistake once in my early gardening days, tossing some bulbs into the ground in December, only to be met with a pitiful showing the next year. Lesson learned!
For those in colder zones (USDA Zones 3-5), aim for early fall so the bulbs can root before the ground freezes. In milder areas (Zones 6-8), you’ve got a bit more wiggle room, but don’t push it past late November. Check your local frost dates to be sure. And here’s a pro tip: if you’re ordering bulbs online, place your order early to avoid missing the planting window. You can explore more about fall bulb planting schedules for a deeper dive into timing across different regions.
Choosing the Right Spot and Soil Conditions
Ornamental onions aren’t overly fussy, but they do have preferences when it comes to location and soil. Full sun is non-negotiable—aim for at least 6 hours of direct sunlight daily. They’ll tolerate a bit of shade, but you’ll notice fewer or smaller blooms if they’re not soaking up enough rays. As for soil, well-draining is the name of the game. Alliums hate “wet feet,” and soggy soil can lead to bulb rot faster than you can say “onion.” If you’re dealing with heavy clay soil like I was in my backyard, mix in some compost or sand to improve drainage before planting.
Picture this: you’ve got a sunny border along your fence, but the soil is a compacted mess. Don’t despair! Spend a little time loosening it up with a garden fork and adding organic matter. I’ve found that a pH between 6.0 and 7.0 works best—test your soil if you’re unsure. And if drainage is still an issue, consider planting in raised beds. Curious about soil prep for other bulbs? Check out our guide on preparing soil for bulb planting for more actionable tips.
Planting Depth and Spacing: Getting It Just Right
Now, let’s get to the nitty-gritty of planting tips for ornamental onions: depth and spacing. A general rule of thumb is to plant bulbs at a depth of about three times their height. For smaller Alliums like Allium sphaerocephalon, that might mean 3-4 inches deep, while giants like Allium ‘Globemaster’ need a good 6-8 inches. Dig a hole, pop the bulb in with the pointy end up, and cover it with soil. Sounds simple, right? But I’ve seen folks plant bulbs upside down—don’t be that gardener!
Spacing depends on the variety and the look you’re going for. For a natural, meadow-like effect, plant in clusters of 5-7 bulbs, spacing them 4-6 inches apart for smaller types and up to 12 inches for larger ones. I love grouping Allium ‘Mount Everest’ in odd numbers—it creates a balanced yet organic vibe. One year, I overcrowded a bed thinking “more is better,” only to end up with stunted growth due to competition. Give them room to breathe, and you’ll be rewarded with fuller blooms.
Watering and Aftercare: Don’t Drop the Ball
Once your ornamental onions are in the ground, they don’t need much coddling, but a little attention goes a long way. Water thoroughly after planting to help settle the soil and kickstart root growth. If fall rains are sparse, give them a drink every week or so until the ground freezes. Come spring, when growth emerges, keep the soil moderately moist but not waterlogged. Overwatering is a common rookie mistake—trust me, I’ve drowned a few bulbs in my zeal to “help” them along.
After they bloom, let the foliage die back naturally. It’s tempting to cut it down for a tidy look, but those leaves are feeding the bulb for next year’s show. I usually tuck fading Allium foliage behind other perennials to hide the mess. And if you’re wondering about fertilizing, a light application of balanced bulb fertilizer in early spring can give them a boost. For more on post-planting care, take a peek at our bulb aftercare guide.
Pest and Disease Prevention: Staying Ahead of Trouble
One of the perks of ornamental onions is their resilience, but they’re not immune to issues. Onion flies and thrips can occasionally target them, while overly wet conditions might invite fungal diseases like rot. My go-to prevention tip is to ensure good air circulation by not overcrowding plants. If pests show up, a blast of water or insecticidal soap usually does the trick—I’ve had luck with this on smaller infestations.
Another trick up my sleeve is companion planting. Pairing Alliums with roses or other pest-prone plants can help, as their strong scent often deters bugs. I’ve noticed fewer aphids on my roses since planting Allium ‘Gladiator’ nearby. Keep an eye out for yellowing leaves or soft bulbs, which could signal trouble. If you catch it early, you can often save the plant by improving drainage or removing affected bulbs.
Creative Design Ideas with Ornamental Onions
Beyond the basics of planting tips for ornamental onions, let’s talk aesthetics. These plants are showstoppers, so why not play with their unique shapes in your garden design? I love mixing tall varieties like Allium ‘Ambassador’ with lower-growing perennials like catmint or salvia for a layered effect. Or plant them in drifts through a gravel garden for a modern, minimalist vibe. Their architectural form can also anchor a mixed border—think of them as nature’s exclamation points.
One of my favorite experiments was underplanting Alliums with tulips. The tulips bloom first, then the Alliums take over, extending the color show. It’s like getting two seasons for the price of one! Just remember that taller varieties might need staking in windy areas. I learned this the hard way when a storm flattened my prized Allium giganteum. A simple bamboo stake would’ve saved the day.
References
- Royal Horticultural Society – Growing Guide for Alliums
- University of Minnesota Extension – Growing Alliums
- BBC Gardeners’ World – How to Grow Alliums
- Missouri Botanical Garden – Allium Care Guide
Disclaimer: This article is for informational purposes only, based on general research and personal gardening experience. It is not intended to serve as a substitute for professional horticultural or landscaping advice. Gardening conditions and results can vary widely based on climate, soil type, and individual care practices. Always consult a qualified professional, such as a local extension service or certified horticulturist, for personalized guidance tailored to your specific garden environment and needs. The author and publisher are not responsible for any adverse effects or damages resulting from the application of the information provided in this content.
This content is for informational purposes only and not a substitute for professional advice.