Ever thought about bringing a bit of fresh, oniony flavor right into your kitchen without stepping foot outside? Planting chive seeds indoors is a game-changer for home cooks and gardening enthusiasts alike. It’s not just about convenience; it’s about having control over your herbs, knowing they’re free from pesticides, and enjoying that burst of green even when the snow’s piling up outside. If you’re new to indoor gardening or just looking to brush up on some tips, I’ve got you covered. Let’s dive into how to plant chive seeds indoors easily, with practical steps, a few personal lessons learned, and insights to ensure your chives thrive.
Why Plant Chive Seeds Indoors?
Starting chives indoors isn’t just a whim—it’s a strategic move. For one, you get a head start on the growing season, especially if you live in a region with short summers or harsh winters. I remember my first attempt at outdoor chives in a particularly frosty spring; half the seeds didn’t even sprout because of an unexpected cold snap. Indoors, you control the environment—temperature, light, and even pesky pests. Plus, chives are a low-maintenance herb. They don’t demand much space, making them perfect for a sunny windowsill or a small apartment setup. And let’s be real: snipping fresh chives for your morning omelet feels like a small victory every time.
Beyond convenience, indoor chives can be a year-round source of flavor and nutrition. They’re packed with vitamins A and C, and their mild onion taste elevates everything from soups to salads. Why settle for store-bought when you can grow your own with minimal effort?
Choosing the Right Chive Seeds and Supplies
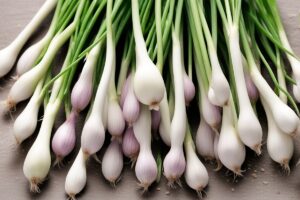
Before you get your hands dirty, let’s talk seeds and gear. Not all chive seeds are created equal. Opt for a reputable brand or supplier—look for organic or heirloom varieties if you’re after robust flavor. Common chives (Allium schoenoprasum) are the go-to for most home growers, but garlic chives (Allium tuberosum) offer a subtle garlic kick if you’re feeling adventurous. I once tried a mix of both in the same pot just to experiment, and it turned out to be a delightful surprise at dinner parties—guests couldn’t stop asking about the unique taste.
You’ll also need a few basics: small pots or seed trays with drainage holes, a quality potting mix (look for one labeled for herbs or seed starting), a spray bottle for gentle watering, and a sunny spot or grow light. Don’t skimp on the soil—chives hate heavy, waterlogged dirt. Mix in some perlite or vermiculite if your potting mix feels too dense. Trust me, I learned this the hard way after drowning a batch of seedlings in overly compacted soil. A little prep here saves a lot of heartache later.
Step-by-Step: How to Plant Chive Seeds Indoors Easily
Ready to plant? Let’s break this down into bite-sized steps so you can get started without second-guessing yourself. Imagine you’re setting up a mini garden on your kitchen counter—it’s that simple.
- Prepare Your Containers: Fill your pots or trays with potting mix, leaving about half an inch of space at the top. Lightly tamp down the soil to avoid air pockets but don’t pack it like a brick.
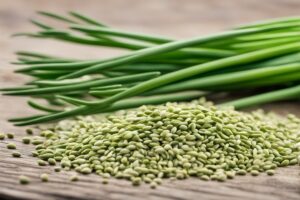
- Sow the Seeds: Sprinkle chive seeds on the surface—about 5-10 seeds per small pot since not all will germinate. Cover them with a thin layer of soil, no more than a quarter-inch deep. Chives need light to sprout, so don’t bury them too deep.
- Water Gently: Use a spray bottle to mist the soil until it’s damp but not soggy. Overwatering is the silent killer of seedlings, so err on the side of caution.
- Provide Warmth and Light: Place the pots in a warm spot (around 60-70°F or 15-21°C) with at least 6 hours of indirect sunlight daily. If your windowsill isn’t cutting it, a grow light works wonders. I’ve used a cheap LED grow light for years, and it’s been a lifesaver during gloomy winters.
- Be Patient: Germination takes 7-14 days, sometimes longer. Keep the soil moist and resist the urge to poke around. Once sprouts appear, thin them out if they’re crowded—leave the strongest 2-3 per pot.
That’s it! In a few weeks, you’ll see those slender green shoots poking up, ready to transform your meals.
Caring for Indoor Chives: Tips for Thriving Plants
Planting is just the beginning—now you’ve got to keep those chives happy. Water them when the top inch of soil feels dry, but don’t let them sit in a puddle; good drainage is non-negotiable. Rotate the pots every few days if they’re by a window to ensure even growth. I forgot to do this once, and my chives grew lopsided, leaning toward the light like they were auditioning for a dramatic role.
Light is critical. If you notice your chives getting leggy—tall and spindly with sparse leaves—they’re begging for more sun. Bump up their exposure or invest in that grow light I mentioned. Fertilize sparingly; a diluted liquid fertilizer once a month is plenty. Overfeeding can lead to weak, floppy growth, and nobody wants droopy chives. Lastly, snip the leaves regularly to encourage bushiness—think of it as giving them a little haircut. Just don’t cut more than a third of the plant at once, or you’ll stress it out.
Common Challenges and How to Tackle Them
Let’s not sugarcoat it—growing chives indoors isn’t always smooth sailing. One common hiccup is poor germination. If your seeds aren’t sprouting after two weeks, check the temperature. Chives sulk if it’s too cold, so consider a heat mat if your space is drafty. Another issue is pests like aphids, even indoors. I had a tiny infestation once after bringing in a contaminated plant from outside. A quick rinse with soapy water and a watchful eye sorted it out, but prevention is better—always inspect new plants before they join your indoor garden.
Overwatering is the bane of many a beginner’s existence. If your chives look yellow or wilted despite wet soil, you’re drowning them. Ease up on the H2O and ensure your pots drain well. And if growth stalls, don’t panic. Sometimes chives just need a little time to adjust. Gardening teaches patience, doesn’t it? Stick with it, and you’ll figure out their rhythm.
Harvesting and Using Your Indoor Chives
Here’s the fun part—reaping what you’ve sown. Once your chives reach about 6 inches tall, usually 6-8 weeks after planting, you can start harvesting. Use scissors to snip leaves near the base, leaving at least 2 inches of growth so the plant can recover. Fresh chives are a culinary Swiss Army knife—sprinkle them on baked potatoes, stir them into dips, or toss them into a salad for a zesty punch. I love adding them to scrambled eggs; it’s become my weekend ritual.
If you’ve got more than you can use, don’t let them go to waste. Chop and freeze them in ice cube trays with a bit of water or oil—perfect for tossing into soups later. Or dry them, though I’ll warn you, they lose some flavor compared to fresh. The best part? Chives are perennials. With proper care, they’ll keep coming back, giving you a steady supply right from your windowsill.
References
- University of Minnesota Extension – Growing Chives
- Missouri Botanical Garden – Allium schoenoprasum
- Penn State Extension – Growing Herbs Indoors
- Royal Horticultural Society – Growing Chives
- Wisconsin Department of Public Instruction – Chives Fact Sheet
Disclaimer: This article is for informational purposes only, based on general research and personal experience—it’s not a substitute for professional advice. Gardening conditions, indoor environments, and individual circumstances can vary widely, so results may differ. Always consult a qualified professional, such as a horticulturist or local extension service, for personalized guidance tailored to your specific situation. The information provided here is intended to educate and inspire, but it should not be considered a definitive solution for all gardening challenges or issues.
This content is for informational purposes only and not a substitute for professional advice.