
Ever thought about growing your own herbs right on your windowsill or balcony? If you’re itching to add a burst of flavor to your dishes, learning to grow dill seeds in pots is a fantastic place to start. Dill, with its feathery leaves and distinct aroma, isn’t just a culinary gem—it’s also surprisingly easy to cultivate, even if you’re short on space or new to gardening. I’ve been growing dill in containers for years now, and let me tell you, there’s nothing quite like snipping fresh fronds for a homemade pickle recipe or a zesty salad. In this guide, I’ll walk you through every step to successfully grow dill seeds in pots, sharing practical tips, personal mishaps, and expert-backed insights to help you avoid common pitfalls. Let’s dig in—pun intended!
Why Grow Dill Seeds in Pots?
Before we get our hands dirty, let’s talk about why growing dill in pots is such a game-changer. For starters, not everyone has a sprawling backyard, right? If you’re like me, living in an apartment with just a small balcony, container gardening opens up a world of possibilities. Pots let you control the soil, drainage, and location—key factors when dealing with a finicky herb like dill. Plus, dill’s tall, slender growth (it can reach up to 3 feet!) makes it prone to wind damage in open gardens, but a pot can be moved indoors during storms. And here’s a little secret from my own trial and error: growing in pots helps manage dill’s tendency to self-seed everywhere. Trust me, I once had dill popping up in every corner of my tiny patio after neglecting to harvest the seeds!
Another perk? You can grow dill year-round by moving pots indoors during colder months, especially if you’re in a region with harsh winters. According to the University of Minnesota Extension, dill thrives in controlled environments, making container gardening a smart choice for consistent harvests. So, whether you’re a city dweller or just want to keep your herbs close to the kitchen, pot-grown dill is a no-brainer.
Choosing the Right Pot and Soil for Dill Seeds
Now, let’s get down to brass tacks: picking the right pot and soil. Dill isn’t overly picky, but it does have some non-negotiables. First off, go for a pot that’s at least 12 inches deep and wide. Why? Dill develops a long taproot, and cramped roots can stunt its growth. I learned this the hard way when I tried using a shallow container—my poor dill barely reached a foot before wilting. A pot with drainage holes is also a must; dill hates “wet feet,” and soggy soil invites root rot.
For soil, aim for a well-draining, loamy mix with a pH between 5.5 and 6.5. I usually mix equal parts potting soil, compost, and a bit of sand to improve drainage. If you’re buying a pre-made mix, look for one labeled for herbs or vegetables. Pro tip: toss in some organic matter like aged manure before planting. It’s like giving your dill a nutrient-packed head start. The Royal Horticultural Society notes that dill prefers moderately fertile soil, so don’t overdo the fertilizer—too much nitrogen can lead to lush leaves but weak flavor.
Sowing Dill Seeds in Pots: Step-by-Step
Ready to plant? Sowing dill seeds in pots is straightforward, but timing and technique matter. Dill is a cool-season herb, so spring or early fall are ideal times to start. If you’re in a hot climate, aim for a spot with partial shade during summer to prevent bolting (when the plant flowers prematurely). Here’s how I do it, based on years of tweaking my approach:
- Soak the seeds: Dill seeds can be slow to germinate, taking 14-21 days. I soak mine in lukewarm water for 24 hours to soften the hard outer shell and speed things up.
- Plant shallowly: Fill your pot with soil, then sprinkle seeds about ¼ inch deep and 1-2 inches apart. Cover lightly with soil—don’t bury them too deep, or they’ll struggle to sprout.
- Water gently: Use a spray bottle or a watering can with a fine rose to avoid washing away the seeds. Keep the soil moist but not waterlogged.
- Place in sunlight: Set the pot in a spot with 6-8 hours of direct sunlight daily. A south-facing windowsill works wonders if you’re growing indoors.
One thing I’ve noticed is that patience is key. My first batch of dill took forever to sprout, and I nearly gave up. But once they popped up, they grew like weeds! If you’re impatient like I was, resist the urge to overwater or dig around to “check” on them—it’ll only set you back.
Caring for Dill in Pots: Water, Light, and More
Once your dill seeds sprout, the real work begins. Caring for dill in pots isn’t rocket science, but it does require attention. Watering is a balancing act—keep the soil consistently moist but never soggy. I water mine every 2-3 days, depending on the weather, using my finger to test the top inch of soil. If it’s dry, it’s time to water. Overwatering is a common rookie mistake, and I’ve lost a few plants to it myself. Imagine you’re dealing with a Goldilocks situation: not too much, not too little, just right.
Light is another biggie. Dill craves full sun, so don’t skimp on those rays. If you’re growing indoors and notice the plants leaning toward the window, rotate the pot every few days for even growth. As for feeding, dill doesn’t need much. I apply a diluted liquid fertilizer (like a 10-10-10 mix) once a month, but honestly, if your soil is decent, you might not need it at all. The Missouri Botanical Garden warns against over-fertilizing, as it can dilute the herb’s signature flavor.
Oh, and keep an eye out for pests like aphids. They love dill as much as we do! A quick spray of soapy water usually does the trick for me, but you can also introduce ladybugs if you’re feeling fancy. And don’t forget to pinch off any flower heads if you’re growing dill for its leaves—once it flowers, the foliage gets bitter.
Harvesting and Using Your Potted Dill
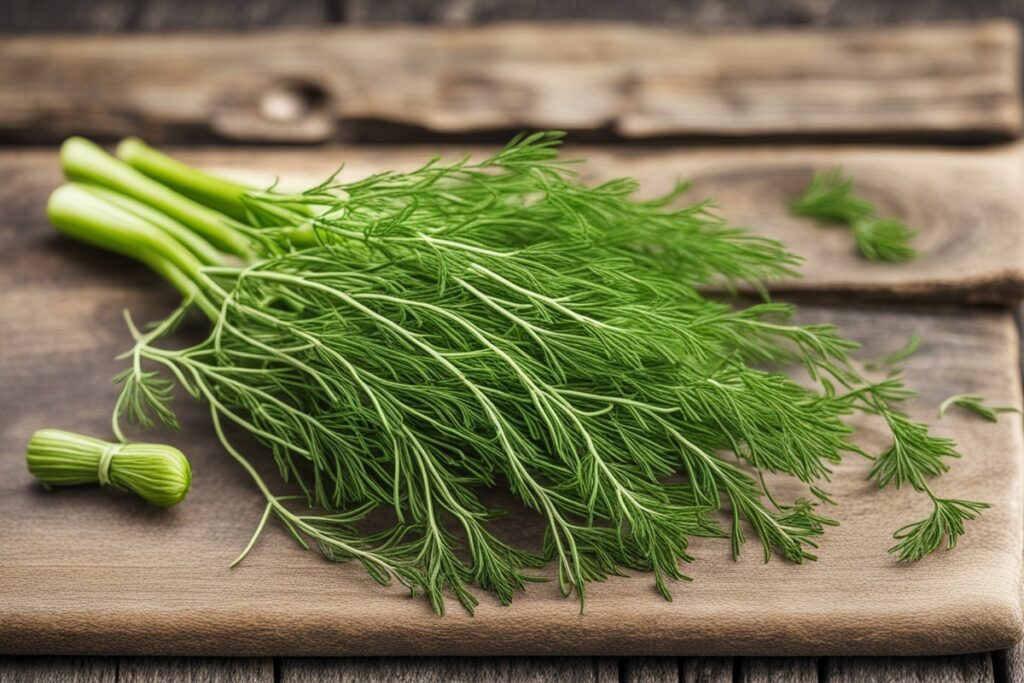
Here’s the fun part: harvesting! You can start snipping dill leaves once the plant reaches 8-10 inches tall, usually about 6-8 weeks after sowing. Use scissors to cut the outer leaves near the stem, and don’t take more than a third of the plant at once—it needs some foliage to keep growing. I love adding fresh dill to fish dishes or tossing it into potato salads. If you let the plant flower, you can harvest the seeds for pickling or replanting. Just wait until the seed heads turn brown, then shake them into a paper bag. Easy peasy!
One memorable harvest for me was when I grew enough dill to make a big batch of homemade pickles for a family barbecue. Everyone raved about the flavor, and I couldn’t help but feel a little proud. There’s something deeply satisfying about using herbs you’ve grown yourself—don’t you think?
Common Challenges When Growing Dill in Pots
Let’s be real: growing dill in pots isn’t always smooth sailing. One issue I’ve faced is bolting, especially during hot spells. If your dill starts flowering too soon, it’s likely stressed from heat or inconsistent watering. Move the pot to a cooler spot and keep the soil moist to delay this. Another headache is leggy growth, often due to insufficient light. If your dill looks spindly, it’s begging for more sun—consider a grow light if natural light is scarce.
Diseases like powdery mildew can also creep in if air circulation is poor. I’ve dealt with this by spacing my pots apart and avoiding overhead watering. And if your dill just won’t grow, double-check your soil drainage. A friend of mine once swore her dill hated her, only to realize her pot had no drainage holes—problem solved once she repotted it! The key is to troubleshoot early and not throw in the towel at the first sign of trouble.
References
- University of Minnesota Extension – Growing Dill
- Royal Horticultural Society – How to Grow Dill
- Missouri Botanical Garden – Dill Plant Profile
- University of Illinois Extension – Dill
- UBC Botanical Garden – Growing Herbs in Containers
Disclaimer: This article is for informational purposes only, based on general research and personal experience. It is not intended to serve as a substitute for professional advice. Gardening conditions, climates, and individual circumstances can vary widely, so results may differ from those described. Always consult a qualified professional, such as a local horticulturist or extension service, for personalized guidance tailored to your specific situation. The author and publisher are not responsible for any adverse effects or consequences resulting from the use of the information provided in this content.
This content is for informational purposes only and not a substitute for professional advice.
