Ahh, early spring—a time when the ground is just starting to wake up, the air carries that fresh, earthy scent, and gardeners like us get that itch to dig in the dirt. If you’re anything like me, you’ve probably got a packet of radish seeds sitting on your kitchen counter, just begging to be planted. And why not? Planting radish seeds in early spring is one of the smartest moves you can make for a quick, rewarding harvest. These little powerhouses are fast-growing, hardy, and perfect for kicking off the gardening season. But, let’s be real: getting it right takes a bit of know-how. So, let’s dive into everything you need to know to make those radishes thrive, from soil prep to harvest, with a few hard-earned tips from my own backyard experiments.
Why Plant Radish Seeds in Early Spring?
Radishes are the ultimate cool-season crop. They love the mild temperatures of early spring, typically between 50°F and 65°F, and can even handle a light frost. Plant them too late, and the heat of summer will turn them woody and bitter—trust me, I’ve bitten into a few of those disasters after procrastinating one year. Early spring planting, usually as soon as the soil can be worked (think late February to early April, depending on your zone), gives radishes the perfect window to grow crisp and tender. Plus, they mature in as little as 20-30 days for some varieties. How’s that for instant gratification? Beyond speed, starting early means you can succession-plant every couple of weeks for a continuous harvest before the warm-weather crops take over your garden beds.
Choosing the Right Radish Varieties for Early Spring
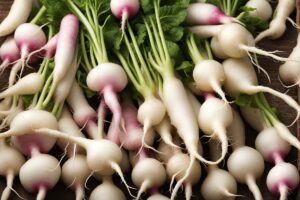
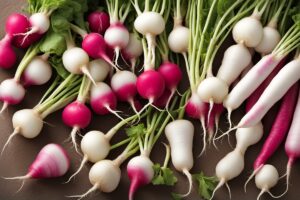
Not all radishes are created equal, especially when you’re planting in the fickle weather of early spring. Over the years, I’ve learned that some varieties handle the cold and variable conditions better than others. ‘Cherry Belle,’ for instance, is a classic round, red radish that’s reliable and quick to mature—perfect for beginners. If you’re feeling adventurous, try ‘French Breakfast,’ an elongated variety with a mild, peppery kick that thrives in cool temps. For something unique, ‘Easter Egg’ radishes come in a mix of colors and are just as hardy. When I first planted these, my kids were thrilled to pull up purple and white roots—it’s like a treasure hunt! Check your seed packet for days-to-maturity (aim for 20-40 days) and cold tolerance to match your local climate. A quick tip: always buy from reputable seed suppliers to ensure germination rates. There’s nothing worse than waiting weeks for sprouts that never show up.
Preparing Your Soil for Planting Radish Seeds in Early Spring
Here’s where things get down and dirty—literally. Radishes aren’t fussy, but they do demand well-drained, loose soil to grow those perfect, unblemished roots. If your soil is heavy clay, like mine was when I started gardening in a new plot a few years back, you’ll need to amend it. I spent a weekend mixing in compost and a bit of sand to loosen things up, and the difference was night and day. Aim for a pH between 6.0 and 7.0—most university extension services, like the one at Oregon State, recommend testing your soil if you’re unsure. Clear out rocks and debris; radish roots will fork or split if they hit obstacles. And here’s a pro tip: don’t overdo the nitrogen. Too much, and you’ll get lush tops with puny roots. A balanced, organic fertilizer or well-rotted manure worked in a week before planting should do the trick. Imagine you’re dealing with a finicky guest at dinner—you want to set the table just right, not overcomplicate the meal.
How to Plant Radish Seeds for Optimal Growth
Planting radish seeds in early spring is straightforward, but a few small tweaks can make a big difference. Sow seeds directly into the ground—radishes don’t transplant well. I usually mark out rows about 12 inches apart with a stick or the edge of a hoe. Plant seeds about half an inch deep and space them 1-2 inches apart; overcrowding leads to stunted roots, as I learned the hard way during a rushed planting session one chilly March morning. Cover them lightly with soil and give them a gentle watering. If a frost is forecasted, toss some row cover or even an old bedsheet over the bed for protection. Keep the soil consistently moist but not waterlogged—think of it as a balancing act. Within 5-10 days, you should see those first green shoots poking through. Isn’t it amazing how quickly nature gets to work?
Caring for Radish Seedlings in Early Spring Conditions
Once your radish seeds sprout, the real fun begins—but so does the responsibility. Early spring weather can be a rollercoaster, with sudden cold snaps or unexpected rain. Keep an eye on moisture levels; if the soil dries out, growth slows, and roots can crack. On the flip side, too much water invites rot or pests like slugs, which I’ve battled more times than I care to admit. Thinning is critical—pull out weaker seedlings to give the stronger ones room to grow, aiming for 2-3 inches between plants. I hate wasting plants, so I sometimes eat the thinned greens in a salad. Weeds are another sneaky enemy; they’ll compete for nutrients, so pull them early. And don’t forget about pests like flea beetles—tiny holes in the leaves are a dead giveaway. A dusting of diatomaceous earth or a floating row cover has saved my crop more than once. According to the University of Minnesota Extension, consistent care at this stage sets the stage for a bumper harvest, and I’ve found that to be spot-on.
Harvesting and Enjoying Your Early Spring Radishes
There’s nothing quite like pulling up your first radish of the season—crisp, colorful, and bursting with flavor. Most varieties are ready in 20-40 days, but don’t wait too long; oversized radishes get pithy and lose their zing. I check mine by gently brushing away soil at the root’s shoulder—if it looks full-sized, it’s time. Harvest in the morning after a light watering for the best texture. One year, I left a few ‘Cherry Belle’ radishes in too long, hoping for bigger roots, and ended up with something closer to a sponge than a snack. Lesson learned! Use the greens too—they’re peppery and great in soups or stir-fries. Store roots in the fridge in a damp cloth or perforated bag for up to a week. If you’ve planted successively, you’ll have a steady supply through spring. Why not toss a few sliced radishes into a salad or pickle them for a tangy treat? The possibilities are endless, and the satisfaction of growing your own? Priceless.
References
- Oregon State University Extension Service – Growing Radishes
- University of Minnesota Extension – Growing Radishes
- Penn State Extension – Radish Production
- Missouri Botanical Garden – Radish Growing Tips
- Clemson University Cooperative Extension – Radish Factsheet
Disclaimer: This article is for informational purposes only, based on general research and personal gardening experience. It is not intended to serve as a substitute for professional advice. Gardening conditions, soil types, and climate zones vary widely, and what works in one area may not apply to another. Always consult a qualified professional, such as a local extension agent or horticulturist, for personalized guidance tailored to your specific situation. Additionally, while care has been taken to ensure the accuracy of the information provided, results may vary, and the author assumes no liability for any issues arising from the application of the advice given. Your safety and the health of your garden are paramount, so proceed with caution and due diligence when implementing new techniques or products.
This content is for informational purposes only and not a substitute for professional advice.