Chives are one of those garden staples that keep on giving. Whether you’re sprinkling their delicate, oniony leaves over a baked potato or using their pretty purple blooms to garnish a salad, they’re a joy to grow. But here’s a question that often pops up among gardeners: when and how do you harvest chive seeds after blooming? If you’ve ever stood in your garden, staring at those fluffy flower heads, wondering if you’ve missed the boat, you’re not alone. I’ve been there myself, scratching my head over timing and technique. Today, I’m diving deep into the art and science of harvesting chive seeds post-bloom, sharing practical tips, personal anecdotes, and expert-backed insights to help you nail this process.
Why Harvest Chive Seeds After Blooming?
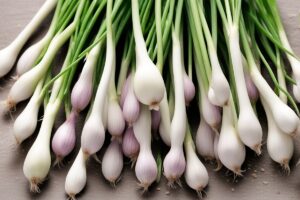
Let’s start with the “why.” Harvesting chive seeds after blooming isn’t just about saving a few bucks on next season’s planting. It’s a way to preserve the unique traits of your plants—especially if you’ve got a particularly vigorous or flavorful variety. Plus, chives (Allium schoenoprasum) are perennials, so they’ll keep coming back year after year, but collecting seeds gives you the power to expand your patch or share with fellow gardeners. Imagine gifting a packet of home-harvested seeds to a friend who’s just starting their herb garden. There’s something deeply satisfying about that, don’t you think?
Beyond sentiment, timing matters. Chives bloom in late spring to early summer, and once those flowers fade, the seeds are ready to form. Waiting until after blooming ensures the seeds are mature enough to germinate successfully. Miss this window, and you might end up with duds—or worse, no seeds at all if the plant scatters them to the wind before you get there.
Recognizing the Right Time to Harvest Chive Seeds
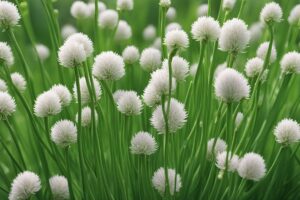
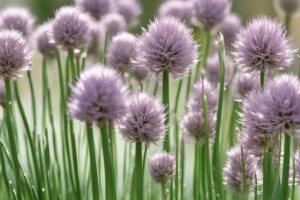
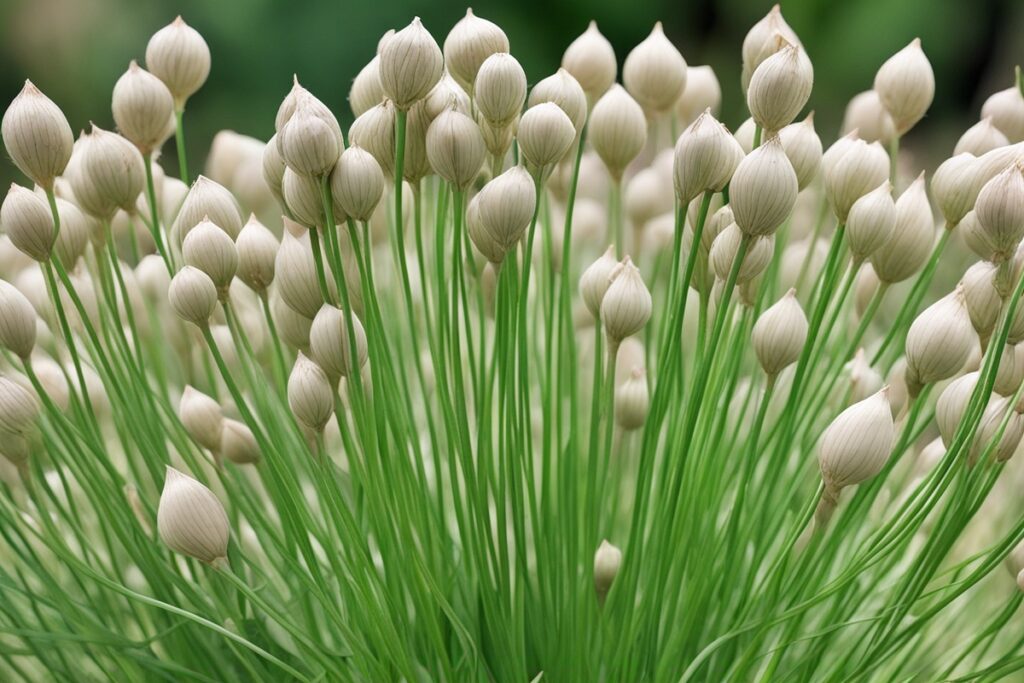
Timing is everything when it comes to harvesting chive seeds after blooming. So, how do you know when they’re ready? Look for the flower heads to turn from vibrant purple to a dull brown or tan. The petals will have dried up and fallen off, leaving behind a cluster of tiny black seeds nestled in papery husks. I remember the first time I noticed this transformation in my own garden—it was like the plant was signaling, “Hey, I’m done showing off; come get these seeds!”
Typically, this happens 2-3 weeks after the peak bloom, depending on your climate. In warmer zones, it might be faster; in cooler areas, a tad slower. A pro tip? Gently shake a flower head over your hand. If tiny black seeds fall out, you’re golden. If not, give it a few more days. Don’t rush it—patience pays off here. Harvesting too early can mean immature seeds that won’t sprout, and nobody wants to waste their time on that.
Step-by-Step Guide to Harvesting Chive Seeds
Now that you’ve got the timing down, let’s walk through the actual process of harvesting chive seeds after blooming. It’s pretty straightforward, but a few small tricks can make a big difference. I’ve refined this method over years of trial and error in my backyard herb plot, so trust me when I say these steps work.
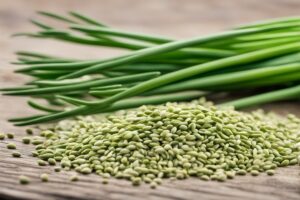
First, grab a pair of scissors or garden shears and a small paper bag or envelope. Avoid plastic—it can trap moisture and lead to mold. Head out to your chive patch on a dry, sunny day; wet seeds are a recipe for rot. Snip the dried flower heads off the stalks, leaving a bit of stem for easy handling. Drop them directly into your bag. If the heads are really brittle, you might notice seeds falling as you cut—just shake the bag gently to collect any stragglers.
Once you’ve gathered a good batch, bring them indoors to a cool, dry spot. Lay the heads out on a tray or newspaper for a day or two to ensure they’re fully dry. Then, rub the heads between your fingers to release the seeds. You’ll see those tiny black specks—each one a potential new plant. Sift out any debris, and store the seeds in a labeled envelope in a cool, dark place. Done right, they can stay viable for 1-2 years. Easy peasy, right?
Common Mistakes to Avoid When Harvesting Chive Seeds
Even seasoned gardeners can slip up when harvesting chive seeds after blooming. I’ve made my fair share of blunders, and I’m betting you don’t want to learn the hard way like I did. One classic mistake is waiting too long. Chives are notorious for self-sowing, meaning if you dilly-dally, the seeds will scatter before you can collect them. I once lost an entire crop of seeds to a windy day because I kept saying, “I’ll do it tomorrow.” Lesson learned: procrastination is not your friend.
Another pitfall is improper storage. Tossing seeds into a damp garage or a sunny windowsill is asking for trouble. Moisture and heat are the enemies of seed viability. And don’t forget to label your stash—I can’t tell you how many times I’ve mixed up chive seeds with something else (looking at you, dill). A quick note with the date and variety saves a world of confusion come planting time.
Using or Sharing Your Harvested Chive Seeds
So, you’ve successfully harvested chive seeds after blooming—now what? The possibilities are endless! You can sow them in early spring for a fresh crop, either directly in the ground or in trays for later transplanting. Chives aren’t fussy; they’ll grow in most well-drained soils with decent sunlight. I’ve had great luck starting them indoors in late winter, giving them a head start before the last frost.
Alternatively, why not spread the love? Package up your seeds in small envelopes and gift them to neighbors or swap them at a local gardening club. Last year, I traded some of my chive seeds for a packet of rare basil at a community event, and it felt like striking gold. If you’ve got more than you need, consider donating to a school garden or community plot. It’s a small gesture that can inspire the next generation of green thumbs.
Troubleshooting: What If Your Chives Don’t Produce Seeds?
Every now and then, you might run into a snag—your chives bloom beautifully, but no seeds form. What gives? This can happen for a few reasons, and I’ve seen it firsthand in my own garden during particularly wet summers. Poor pollination is often the culprit. Chives rely on bees and other insects to pollinate their flowers, so if pollinators are scarce (think rainy weather or pesticide use nearby), seed production can suffer. If this sounds familiar, try planting pollinator-friendly flowers like marigolds nearby to attract helpers.
Another issue could be over-harvesting the leaves. If you’re constantly snipping chives for the kitchen, the plant might not have enough energy to set seed. I’ve learned to leave a few stalks untouched during blooming season to ensure the plant can focus on reproduction. And if all else fails, don’t sweat it—chives are perennials, so they’ll be back next year. You can also propagate them by division, splitting the clumps every few years for new plants without needing seeds at all.
References
- University of Minnesota Extension – Growing Herbs: Chives
- Missouri Botanical Garden – Allium schoenoprasum
- Penn State Extension – Growing Herbs Outdoors
- Royal Horticultural Society – Growing Chives
- University of Wisconsin-Madison Extension – Chives (Allium schoenoprasum)
Disclaimer: This article is for informational purposes only, based on general research and personal experience. It is not intended to serve as a substitute for professional advice. Gardening conditions, plant health, and individual circumstances can vary widely, so results may differ from those described. Always consult a qualified horticulturist, agricultural extension service, or other expert for personalized guidance tailored to your specific situation. The author and publisher are not responsible for any adverse effects or consequences resulting from the application of the information provided in this content.
This content is for informational purposes only and not a substitute for professional advice.