There’s something magical about transforming a patch of bare earth into a vibrant tapestry of color and life. If you’ve ever dreamed of a garden buzzing with pollinators and bursting with natural beauty, then it’s time to consider planting native wildflower seeds. Growing native wildflowers isn’t just about aesthetics—it’s a powerful way to support local ecosystems, conserve water, and create a low-maintenance landscape that thrives in harmony with nature. In this guide, we’ll dive deep into how to grow native wildflower seeds, sharing practical tips, personal insights, and expert-backed advice to help you succeed. Whether you’re a seasoned gardener or a complete novice, let’s roll up our sleeves and get started!
Why Grow Native Wildflower Seeds?
Have you ever wondered why some gardens seem to flourish effortlessly while others struggle despite constant care? The secret often lies in working with nature rather than against it. Native wildflowers are plants that have evolved over centuries to thrive in your specific region’s climate, soil, and conditions. When you grow native wildflower seeds, you’re choosing species that are already adapted to your area, which means less watering, fewer pesticides, and minimal fuss. Plus, they’re a lifeline for local pollinators like bees, butterflies, and birds, who rely on these plants for food and habitat.
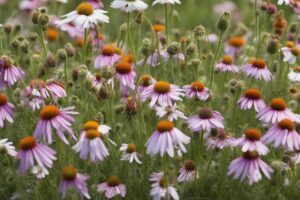
I remember the first time I planted a native wildflower mix in my backyard. I live in a region with hot, dry summers, and I was tired of watching my non-native annuals wilt no matter how much I watered them. Switching to natives like black-eyed Susans and purple prairie clover was a game-changer. Not only did my garden survive the heat, but I also had hummingbirds visiting daily. It felt like I’d unlocked a hidden level in gardening!
Choosing the Right Native Wildflower Seeds for Your Area
Not all wildflowers are created equal, and what grows like wildfire in one state might flop in another. The key to success when you grow native wildflower seeds is selecting species suited to your USDA Hardiness Zone and local ecosystem. Start by researching your region’s native plant list—most state university extension services or local botanical gardens offer free resources to guide you. For example, if you’re in the Midwest, you might opt for seeds like coneflowers or milkweed, while coastal gardeners in the Southeast could lean toward coreopsis or seaside goldenrod.
Imagine you’re standing in a garden center, overwhelmed by colorful seed packets. Don’t just grab the prettiest one! Check the label for details on native status, bloom time, and growing conditions. Better yet, source seeds from a reputable native plant nursery to ensure authenticity. A word of caution: avoid generic “wildflower mixes” that include non-native or invasive species—they can do more harm than good by outcompeting local flora.
Preparing Your Site to Grow Native Wildflower Seeds
Before you scatter those seeds with wild abandon, let’s talk prep work. Native wildflowers are tough cookies, but they still need a fighting chance to establish roots. First, choose a sunny spot—most wildflowers crave at least six hours of direct sunlight daily. Next, clear the area of weeds, grass, and debris. I’ve learned the hard way that skipping this step is like inviting uninvited guests to a party; they’ll take over before your wildflowers even get started.
Soil prep is another critical piece of the puzzle. Unlike pampered garden beds, wildflowers often prefer lean, well-drained soil. If your ground is heavy clay or overly rich, consider mixing in some sand or gravel to mimic their natural habitat. And here’s a little trick I picked up from a fellow gardener: don’t bury your seeds too deep. Many native wildflower seeds need light to germinate, so a light sprinkle of soil or even just pressing them into the ground is often enough. Timing is everything too—sow in late fall for spring germination or early spring for summer blooms, depending on your climate.
Planting and Caring for Native Wildflower Seeds
Now comes the fun part: planting! When you grow native wildflower seeds, think of yourself as a conductor orchestrating a symphony of nature. Scatter the seeds evenly over your prepared area, either by hand or with a seed spreader for larger spaces. If you’re mixing species, blend smaller and larger seeds with a bit of sand to ensure even distribution—I’ve found this prevents clumps of one type dominating the space.
Watering is crucial in the early days, but don’t overdo it. Keep the soil moist until germination (usually 1-3 weeks), then taper off as the plants establish. One summer, I got overzealous with the hose and ended up with a soggy mess that delayed sprouting. Lesson learned: natives often prefer a “tough love” approach once they’re up and running. Weed control is another balancing act—pull invaders early, but don’t stress if a few sneak through. Native wildflowers are scrappy and can often hold their own.
Benefits and Challenges of Growing Native Wildflower Seeds
Let’s weigh the pros and cons, because no garden project is without its hiccups. On the plus side, when you grow native wildflower seeds, you’re signing up for a low-maintenance, eco-friendly landscape. They attract beneficial insects, reduce erosion, and often reseed themselves, saving you time and money. I’ve watched my native meadow patch expand year after year with zero effort on my part—it’s like nature’s gift that keeps on giving.
But it’s not all sunshine and rainbows. Germination can be slow or uneven, testing your patience. Some species might take a year or two to bloom as they focus on root growth first. And if you’ve got nosy neighbors or an HOA with strict lawn rules, a wildflower meadow might raise eyebrows. My advice? Start small with a border or container to test the waters, and communicate the environmental benefits to win over skeptics.
Tips for Long-Term Success with Native Wildflowers
Want to keep your wildflower haven thriving for years to come? Here are some insider tips to grow native wildflower seeds with lasting impact. First, resist the urge to tidy up too much. Leave seed heads standing through winter—they provide food for birds and allow natural reseeding. Second, mow or cut back dead growth in late winter or early spring to make room for new shoots, but only if needed—some areas can be left au naturel.
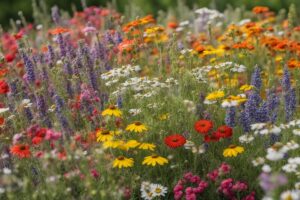
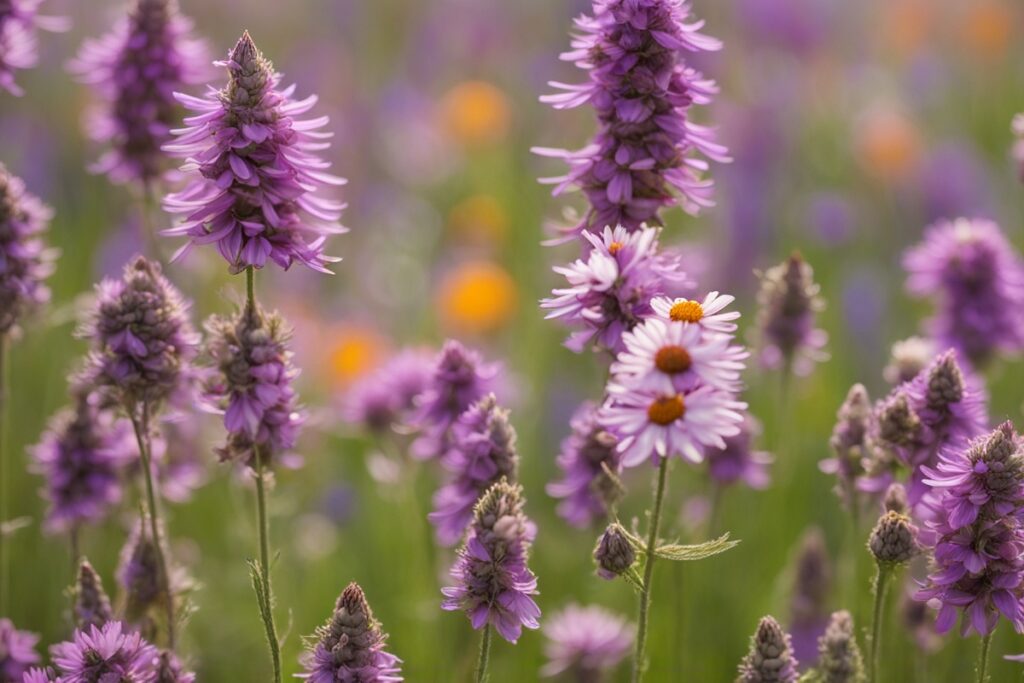
Another gem I’ve picked up from years of trial and error: diversify your seed mix. Planting a variety of species ensures something’s always blooming, keeps pests at bay, and supports a wider range of wildlife. Lastly, keep a garden journal. Jot down what works, what flops, and how your patch evolves. It’s like having a roadmap for future seasons, and trust me, you’ll thank yourself when you’re scratching your head over last year’s successes.
References
- University of Minnesota Extension – Native Plants for Pollinators
- Missouri Botanical Garden – Native Plants for Home Gardens
- Penn State Extension – Planting Native Wildflowers
- USDA Forest Service – Native Plant Materials
- National Wildlife Federation – Native Plants for Wildlife
Disclaimer: This article is for informational purposes only, based on general research and personal experience. It is not intended to serve as a substitute for professional advice. Gardening conditions, plant suitability, and local regulations can vary widely, and what works in one context may not apply to another. Always consult a qualified horticulturist, local extension service, or other professional for personalized guidance tailored to your specific environment and needs. We encourage readers to conduct their own research and seek expert input before undertaking significant landscaping or planting projects to ensure the best outcomes for both their gardens and the surrounding ecosystem.
This content is for informational purposes only and not a substitute for professional advice.