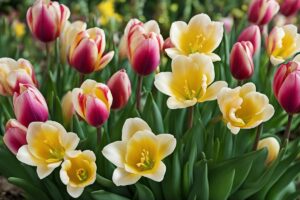
Let’s talk about something every gardener dreams of—those vibrant, fragrant Freesia bulbs bursting into bloom, filling your garden with color and scent. But here’s the kicker: if you don’t get the soil mix right, you might as well be planting pebbles. I’ve been there, trust me. Years ago, I planted my first batch of Freesia bulbs in heavy, clay-packed soil, thinking, “How picky can they be?” Spoiler alert: they didn’t even sprout. That’s when I realized the magic lies in crafting the best soil mix for Freesia bulbs. Today, I’m sharing everything I’ve learned through trial, error, and a whole lot of dirt under my fingernails to help you avoid my rookie mistakes. Let’s dig into how to create the perfect growing environment for these delicate beauties.
Why Soil Mix Matters for Freesia Bulbs
Before we get our hands dirty, let’s break down why soil mix is such a big deal for Freesia bulbs. Freesias, native to South Africa, thrive in well-draining, nutrient-rich conditions. Think of their natural habitat—sandy, loose soils that don’t hold onto water like a sponge. If the soil is too heavy or compacted, water pools around the bulbs, leading to rot faster than you can say “goodbye, blooms.” On the flip side, soil that’s too sandy without enough organic matter won’t hold the nutrients they need to flourish. Striking that balance is key. I’ve seen firsthand how a poor mix can stunt growth—my second attempt with overly sandy soil resulted in weak, floppy stems that couldn’t support the flowers. So, how do we get it just right?
Key Components of the Best Soil Mix for Freesia Bulbs
Creating the best soil mix for Freesia bulbs isn’t rocket science, but it does require a thoughtful blend of ingredients. Here’s what I’ve found works like a charm after years of experimenting. Start with a base of loamy garden soil—about 50% of your mix. This provides structure and a bit of natural fertility. Then, add 25% coarse sand or grit to ensure drainage; Freesias hate wet feet. Finally, mix in 25% well-rotted compost or aged manure for nutrients and to improve soil texture. I’ve used compost from my own backyard bin, and the results were night and day compared to skipping this step—healthier plants, brighter blooms. If you’re dealing with heavy clay soil like I was initially, lighten it up with perlite or vermiculite to prevent compaction. Ever wonder why some gardeners swear by perlite? It’s because those little white specks create air pockets, letting roots breathe easy.
How to Test and Adjust Your Soil Mix
Now, here’s where a bit of elbow grease comes in. Before planting, test your soil mix. Grab a handful and squeeze it. Does it hold together but crumble easily when poked? Perfect. If it’s sticky and forms a tight ball, it’s too heavy—add more sand or perlite. If it falls apart instantly, it’s too dry or sandy, so mix in extra compost. I learned this the hard way when I didn’t bother testing and ended up with a mix that suffocated my bulbs. Another pro tip: check the pH. Freesias prefer slightly acidic to neutral soil, around 6.0 to 7.0. You can grab a cheap pH testing kit at any garden center. If it’s too alkaline, a sprinkle of sulfur can lower it; if too acidic, a bit of lime will balance things out. Imagine you’re prepping for a big garden party—wouldn’t you double-check everything to make sure it’s just right? Same vibe here.
Common Soil Mix Mistakes to Avoid
Let’s chat about the pitfalls I’ve stumbled into—and seen others fall for—when mixing soil for Freesia bulbs. First off, don’t skimp on drainage. I once thought, “Oh, a little extra water won’t hurt,” and used a mix with too much peat moss. Big mistake. The bulbs sat in soggy soil and rotted before they could even think about sprouting. Another no-no? Using fresh manure or uncomposted organic matter. It’s like serving raw dough instead of baked bread—it can burn the roots or introduce pathogens. Stick to aged, decomposed materials. And please, don’t ignore your local conditions. If you’re in a rainy area, prioritize drainage even more by upping the sand or grit ratio. A friend of mine in the Pacific Northwest learned this lesson after losing an entire batch to waterlogged soil during a wet spring. What’s the takeaway? Tailor your mix to your environment, not just a generic recipe.
Container vs. Garden Bed: Adjusting the Mix
Here’s a little curveball: the best soil mix for Freesia bulbs can vary depending on whether you’re planting in containers or garden beds. For containers, I’ve found you need even better drainage since there’s less space for water to escape. I typically go for a 40% loam, 30% sand, and 30% compost mix, sometimes tossing in a handful of perlite for good measure. Pots dry out faster, though, so don’t let them turn into a desert—check moisture often. In garden beds, you’ve got more wiggle room, but you might need to amend the native soil first. When I planted Freesias in my backyard bed, I had to mix in a ton of organic matter because the existing soil was basically hardpan. Picture yourself hauling wheelbarrows of compost on a hot day—it’s a workout, but the blooms are worth it. Whichever method you choose, remember: Freesias aren’t divas, but they do demand a comfy home.
Long-Term Soil Care for Thriving Freesia Bulbs
Getting the initial mix right is only half the battle. To keep your Freesias happy long-term, you’ve got to maintain that soil. After planting, add a layer of mulch—think bark or straw—to retain moisture and keep weeds at bay. I’ve been using pine bark mulch for years, and it works wonders, plus it looks neat. Every season, top-dress with a bit of compost to replenish nutrients; Freesias are light feeders, but they still appreciate a snack. And here’s a tidbit I picked up from a master gardener at a local workshop: rotate your planting spots every few years to prevent soil depletion and disease buildup. Ever notice how the same old spot in your garden starts underperforming? That’s why. Lastly, if you’re in a cold climate, dig up the bulbs after the growing season and store them in a cool, dry place—don’t let them sit in damp soil over winter, or they’ll turn to mush.
By now, you’ve got a solid game plan for crafting the best soil mix for Freesia bulbs. It’s not just about throwing dirt together; it’s about understanding what these plants crave and adapting to your unique setup. Whether you’re a newbie gardener or a seasoned green thumb, I hope my missteps and successes save you some headaches. Picture this: next spring, you’re strolling through your garden, the sweet scent of Freesias wafting through the air, knowing it all started with the right soil mix. Doesn’t that sound like a win? If you’ve got your own soil mix tricks or horror stories, I’d love to hear them—gardening is all about sharing the journey.
References
- University of Minnesota Extension – Growing Freesias
- Missouri Botanical Garden – Freesia Plant Care
- Clemson University Cooperative Extension – Bulb Planting and Care
- Royal Horticultural Society – Growing Freesia
- Colorado State University Extension – Flowering Bulbs
Disclaimer: This article is for informational purposes only, based on general research and personal experience. It is not intended to serve as a substitute for professional advice. Soil conditions, climate, and individual gardening practices can vary widely, and what works in one scenario may not apply to another. Always consult a qualified horticulturist, local extension service, or other gardening professional for personalized guidance tailored to your specific needs and environment. I’m sharing what’s worked for me and what’s supported by reputable sources, but your results may differ, and I encourage you to experiment responsibly and seek expert input when needed.
This content is for informational purposes only and not a substitute for professional advice.