Ahh, spring! That magical time when the earth wakes up, the air smells of renewal, and gardeners like you and me get that itch to dig in the dirt. If you’re looking to add a splash of color and whimsy to your garden, why not sow poppy seeds in spring gardens? These delicate, vibrant blooms are a joy to grow, and with a little know-how, you can transform your yard into a painter’s palette of reds, pinks, and purples. I’ve been planting poppies for over a decade now, and let me tell you, there’s nothing quite like watching those first green shoots poke through the soil after a long winter. In this guide, I’ll walk you through everything you need to know to successfully sow poppy seeds this spring, from timing and soil prep to troubleshooting common hiccups. Let’s dig in!
Why Sow Poppy Seeds in Spring?
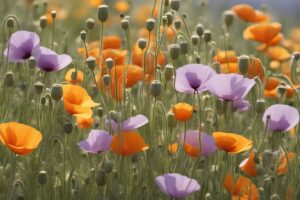
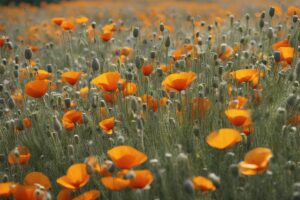
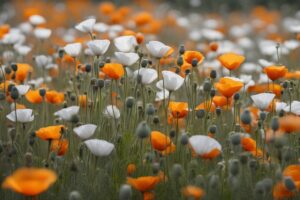
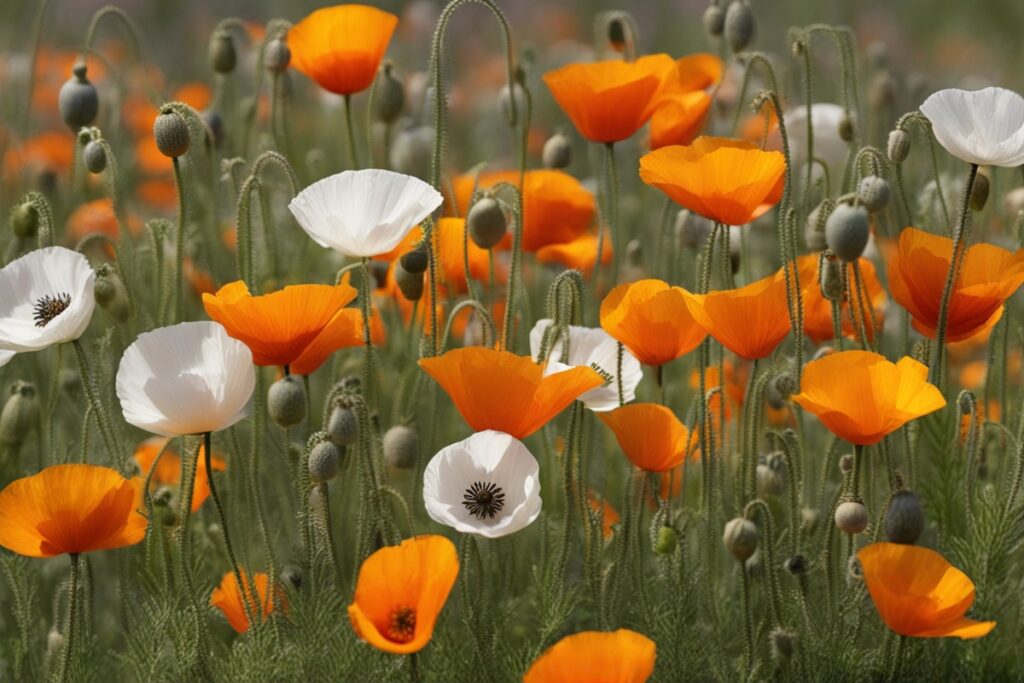
Poppies are one of those flowers that just scream “old-world charm,” don’t you think? But beyond their beauty, there’s a practical reason to sow poppy seeds in spring gardens. Many poppy varieties, like the iconic corn poppy (Papaver rhoeas) or the bold Icelandic poppy (Papaver nudicaule), thrive when planted early in the season. Spring sowing aligns with their natural growth cycle, giving them cool, moist conditions to germinate and establish roots before summer’s heat kicks in. I’ve tried sowing poppies in fall too, and while that works in milder climates, spring planting has consistently given me the best results in my Zone 6 garden. Plus, starting in spring means you’ll often see blooms by early summer—a quick reward for your efforts!
Another perk? Poppies are cold-hardy. Some species even need a period of cold stratification (exposure to chilly temps) to break seed dormancy. Sowing in early spring mimics this natural process, boosting germination rates. Trust me, there’s a certain thrill in scattering those tiny seeds on a crisp March morning, knowing they’re tough enough to handle a late frost.
Choosing the Right Poppy Varieties for Spring Sowing
Not all poppies are created equal, and picking the right type can make or break your spring garden. Over the years, I’ve experimented with a handful of varieties, and I’ve found that annuals like corn poppies and Shirley poppies are fantastic for beginners. They’re fast-growing, reseed themselves if you let them, and come in a rainbow of colors. Perennials like Oriental poppies (Papaver orientale) are another option, though they often take longer to bloom—sometimes not until their second year. If patience isn’t your strong suit, stick with annuals for that instant gratification.
Consider your climate, too. If you’re in a region with harsh winters, annual poppies sown in spring will treat your garden like a one-season fling, blooming brilliantly before bowing out. In milder zones, you might get lucky with self-sowing for next year. A quick tip from my own trial and error: check seed packets for hardiness zones and germination needs. One year, I sowed Oriental poppies without realizing they needed extra cold exposure, and let’s just say the results were… underwhelming. Live and learn!
Timing: When to Sow Poppy Seeds in Spring
Timing is everything when you sow poppy seeds in spring gardens. Get it wrong, and you’re either battling weak germination or stunted plants. Aim to sow as soon as the soil can be worked—typically late winter to early spring, around March or April in most temperate zones. The sweet spot is when daytime temps hover between 50-60°F (10-15°C). Why so early? Poppies love cool weather for germination, and starting early gives them a head start before summer heat stresses them out.
Here’s a little story from my own backyard: a few years ago, I got impatient and waited until late May to sow my corn poppies, thinking warmer soil would speed things up. Big mistake. The seeds struggled to germinate, and the few that did produced spindly, sad-looking plants. Lesson learned—stick to early spring. If you’re unsure about your local timing, check with your regional extension service. They often have planting calendars tailored to your area, which can be a lifesaver.
Preparing Your Garden for Poppy Seeds
Poppies aren’t divas, but they do have preferences. Before you sow poppy seeds in spring gardens, take a moment to prep your plot. These flowers love full sun—six to eight hours a day is ideal—so pick a spot that’s not shaded by trees or buildings. They’re also picky about soil drainage. Heavy, waterlogged soil is a death sentence for poppies, as their roots can rot faster than you can say “soggy mess.” I learned this the hard way after planting in a low-lying area of my yard that turned into a mini swamp after every rain. Half my seeds never even sprouted.
To avoid my rookie mistake, test your soil’s drainage by digging a hole and filling it with water. If it doesn’t drain within a few hours, amend the soil with compost or sand to loosen it up. Poppies aren’t heavy feeders, so don’t go overboard with fertilizer—too much nitrogen can lead to lush foliage but fewer flowers. A light layer of organic matter worked into the top few inches of soil is usually plenty. Once your spot is ready, rake the surface to create a fine, crumbly texture. Those tiny poppy seeds need good contact with the soil to germinate, so don’t leave it clumpy.
How to Sow Poppy Seeds for Best Results
Now for the fun part—sowing! Poppy seeds are tiny, almost like specks of black pepper, so a little goes a long way. Scatter them thinly over your prepared soil; overcrowding can lead to weak plants competing for light and nutrients. I like to mix my seeds with a bit of sand to help spread them evenly—it’s a trick I picked up from a gardening mentor, and it’s saved me from dumping a whole packet in one spot. After scattering, press them lightly into the soil with your hand or the back of a rake. Don’t bury them deep—poppy seeds need light to germinate, so a depth of no more than 1/8 inch is perfect.
Water gently with a fine mist to avoid washing the seeds away. Keep the soil consistently moist (but not soggy) until germination, which usually takes 10-20 days depending on the variety and weather. Imagine you’re tending to a delicate newborn—too much water drowns them, too little leaves them parched. Once seedlings appear, thin them out to about 6-12 inches apart to give each plant room to shine. I’ll admit, thinning feels heartless, like picking favorites among your kids, but it’s necessary for strong, healthy blooms.
Troubleshooting Common Issues When Sowing Poppies
Even with the best intentions, things can go awry when you sow poppy seeds in spring gardens. Let’s troubleshoot a few common headaches. Poor germination is a big one—often caused by sowing too late, burying seeds too deep, or inconsistent watering. If you’re staring at bare soil after three weeks, don’t despair. Check your sowing depth and moisture levels, and consider reseeding if the window for cool weather hasn’t closed. I’ve had to do this myself after a particularly dry spring spell zapped my first batch.
Another issue is pests or diseases. Slugs adore tender poppy seedlings, and I’ve lost more than a few to those slimy sneaks. A simple fix? Sprinkle diatomaceous earth around your plants or set out beer traps (yes, slugs are suckers for a cold one). Fungal issues like powdery mildew can also creep in if air circulation is poor, so space your plants properly and avoid overhead watering. And here’s a pro tip: poppies don’t transplant well due to their taproots, so sow them directly where you want them to grow. I made the mistake of trying to move seedlings once, and they sulked for weeks before giving up entirely.
References
- University of Minnesota Extension – Growing Annual Poppies
- Missouri Botanical Garden – Papaver rhoeas
- Colorado State University Extension – Annual Poppies
- Royal Horticultural Society – Growing Poppies
- Penn State Extension – Growing Poppies
Disclaimer: This article is for informational purposes only, based on general research and personal experience—it’s not a substitute for professional advice. Gardening conditions vary widely based on climate, soil type, and individual circumstances, so results may differ. Always consult a qualified horticulturist, local extension service, or other professional for personalized guidance tailored to your specific garden or region. I’ve shared what’s worked for me, but your mileage may vary, and I encourage you to experiment responsibly and seek expert input when needed.
This content is for informational purposes only and not a substitute for professional advice.