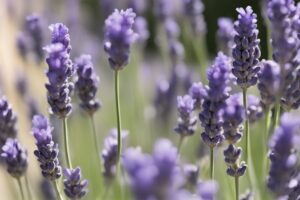
Ever wondered how a tiny lavender seed can transform into a fragrant, blooming masterpiece in your garden? If you’re itching to grow this beloved herb from scratch, you’ve come to the right place. Lavender, with its soothing scent and stunning purple blooms, is a gardener’s dream—but let’s be real, getting those seeds to sprout can feel like cracking a secret code. Don’t worry, though; I’ve been down this road, made the mistakes, and learned the tricks. In this guide, I’ll walk you through how to germinate lavender seeds step-by-step, sharing practical tips, personal insights, and expert-backed advice to help you succeed. Whether you’re a newbie or a seasoned green thumb, let’s dig in and get those seeds sprouting!
Why Germinate Lavender Seeds? Understanding the Challenge
Before we dive into the how-to, let’s talk about why starting lavender from seeds can be a bit of a gamble. Unlike cuttings, which are practically foolproof, lavender seeds are notoriously slow to germinate and often have low success rates. I remember my first attempt—weeks of waiting, only to see a measly two sprouts out of a whole packet! But here’s the thing: growing from seed is rewarding. You get to nurture the plant from its very beginning, and it’s often more budget-friendly than buying established plants. Plus, you can experiment with unique varieties that aren’t always available as seedlings at your local nursery. So, while it’s a challenge, it’s worth the effort if you’ve got patience and a little know-how.
Step 1: Choose the Right Lavender Seeds and Timing
First things first, not all lavender seeds are created equal. There are several species—Lavandula angustifolia (English lavender), Lavandula stoechas (Spanish lavender), and others—and each has its quirks. English lavender, for instance, is hardier and often easier for beginners, while Spanish lavender might need more warmth. When buying seeds, go for a reputable supplier to avoid duds. I’ve had luck with organic seed companies, but always check reviews or ask fellow gardeners for recommendations.
Timing is just as critical. Lavender seeds need a head start, so plan to sow them indoors 8-12 weeks before your last frost date. Imagine you’re in the dead of winter, dreaming of summer blooms—starting seeds in late winter or early spring (think February or March in many regions) sets you up for success. If you miss this window, don’t sweat it; you can still sow later, but expect a longer wait for outdoor planting.
Step 2: Cold Stratification—Tricking Seeds into Sprouting
Here’s where lavender throws a curveball: many varieties, especially English lavender, need a process called cold stratification to break dormancy. In nature, seeds sit through a cold, damp winter before sprouting in spring. We’ve got to mimic that. Take your seeds, mix them with a bit of damp sand or a moist paper towel, and seal them in a plastic bag or container. Pop this into your fridge for 3-6 weeks. I’ve done this with a small Tupperware container, checking weekly to ensure it’s still moist but not moldy. According to the University of Vermont Extension, this cold period tricks the seeds into thinking winter’s over, boosting germination rates. Skip this step, and you might be waiting forever—or worse, see no sprouts at all.
Step 3: Prepare Your Seed-Starting Setup
Once stratification is done, it’s time to set up for sowing. You’ll need a seed-starting tray or small pots, a well-draining seed-starting mix (not regular potting soil—it’s too heavy), and a warm, bright spot. I’ve found that a mix of peat moss, perlite, and vermiculite works wonders for lavender, as it prevents waterlogging, which these seeds hate. Fill your containers, leaving a little space at the top, and lightly moisten the mix. Pro tip: label your trays! I once mixed up lavender with basil seeds and was mighty confused when the scents didn’t match later on.
Place the seeds on the surface—don’t bury them too deep, as lavender needs light to germinate. A light sprinkle of soil or vermiculite (just a pinch) is enough. Cover the tray with a plastic dome or wrap to keep humidity high, and set it in a spot with indirect sunlight or under grow lights. Aim for a cozy 65-70°F (18-21°C). If it’s too cold, germination can stall, so consider a heat mat if your home is drafty.
Step 4: Patience and Care During Germination
Now comes the hardest part: waiting. Lavender seeds can take anywhere from 14 to 30 days to germinate, sometimes even longer. Keep the soil consistently moist but not soggy—think of a wrung-out sponge. I’ve made the mistake of overwatering, and let me tell you, nothing kills seeds faster than a swampy mess. Check daily, and if you’re using a cover, lift it occasionally to prevent mold. Once you see those tiny green shoots, celebrate (quietly, in your head) and remove the cover to let air circulate. Move the tray to a brighter spot, but avoid direct sun for now—baby lavender is delicate.
Here’s a little story from my garden: one year, I nearly gave up after three weeks of nothing. Just as I was about to toss the tray, a single sprout appeared, followed by a few more over the next days. Moral of the story? Don’t lose hope too soon. Gardening is as much about faith as it is about skill.
Step 5: Transplanting and Beyond
Once your seedlings have a couple of true leaves (not just the initial seed leaves), they’re ready to be transplanted into individual pots. Use the same well-draining mix, and handle them gently—those roots are fragile. Harden them off gradually by exposing them to outdoor conditions over a week or so before planting in the ground. Lavender loves full sun and sandy, well-drained soil, so pick a spot wisely. I’ve found that adding a bit of gravel to the planting hole mimics their native Mediterranean habitat and keeps roots happy.
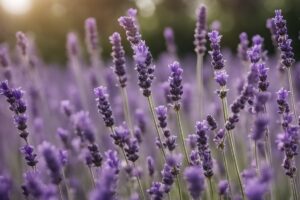
From here, water sparingly—lavender doesn’t like wet feet—and watch for pests or disease. With luck and care, you’ll have blooms by the second year. Isn’t it amazing to think that all this started with a tiny seed and a bit of patience?
Troubleshooting Common Issues with Lavender Seed Germination
Even with the best intentions, things can go awry. If your seeds aren’t sprouting, consider these culprits. First, temperature: too cold, and they’ll sit dormant; too hot, and they might cook. Aim for that sweet spot I mentioned earlier. Second, moisture: overwatering can cause rot, while underwatering leaves seeds high and dry. Third, old seeds—check the packet’s date, as viability drops after a year or two. Lastly, did you skip stratification? That’s often the missing piece. If you’re stumped, reach out to a local gardening group or extension service; I’ve gotten great advice from mine over the years. And hey, if at first you don’t succeed, try, try again—gardening is a learning curve!
References
- University of Maine Cooperative Extension – Growing Lavender in Maine
- University of Minnesota Extension – Growing Lavender
- Missouri Botanical Garden – Lavandula angustifolia
- Colorado State University Extension – Growing Lavender
- Royal Horticultural Society – Growing Lavender
Disclaimer: This article is for informational purposes only, based on general research and personal experience. It is not intended to serve as a substitute for professional advice. Gardening conditions, seed quality, and individual circumstances can vary widely, so results may differ from those described. Always consult a qualified horticulturist, local extension service, or other professional for personalized guidance tailored to your specific situation. The author and publisher are not responsible for any adverse outcomes resulting from the application of the information provided in this guide.
This content is for informational purposes only and not a substitute for professional advice.