Ever thought about growing your own herbs but felt a bit intimidated by the idea of starting from scratch? Well, let me tell you, raising thyme seeds from scratch is not only doable, but it’s also incredibly rewarding. There’s something magical about watching those tiny specks of potential sprout into fragrant, flavorful plants right on your windowsill or in your garden. Thyme, with its earthy aroma and versatility in the kitchen, is a fantastic herb to start with, even if you’re a complete beginner. In this guide, I’m diving deep into how to raise thyme seeds from scratch, sharing practical tips, personal insights, and expert-backed advice to help you succeed. Let’s dig in—pun intended—and get those green thumbs working!
Why Raise Thyme Seeds From Scratch?
Before we get into the nitty-gritty, let’s talk about why you’d even want to raise thyme seeds from scratch instead of just buying a potted plant from the nursery. For one, starting from seeds is often more cost-effective. A packet of thyme seeds can yield dozens of plants for a fraction of the price of a single mature plant. Plus, there’s a certain pride in nurturing something from the very beginning. I remember the first time I saw those tiny green shoots poking through the soil—it felt like I’d unlocked some ancient gardening secret!
Another reason? Variety. When you buy seeds, you often get access to unique thyme varieties—like lemon thyme or creeping thyme—that might not be available as seedlings at your local store. And let’s not forget the learning experience. Raising thyme seeds teaches you patience, observation, and problem-solving, all of which make you a better gardener over time. So, why not take the plunge?
Choosing the Right Thyme Seeds
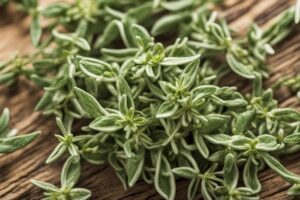
Not all thyme seeds are created equal, and picking the right ones sets the foundation for success. Common thyme (Thymus vulgaris) is a great choice for beginners due to its hardiness and classic flavor, but don’t shy away from experimenting with other types if you’re feeling adventurous. When buying seeds, always go for a reputable supplier—think seed companies with good reviews or local garden centers. I once made the mistake of grabbing a cheap packet from a discount store, only to find half the seeds didn’t even germinate. Lesson learned: quality matters.
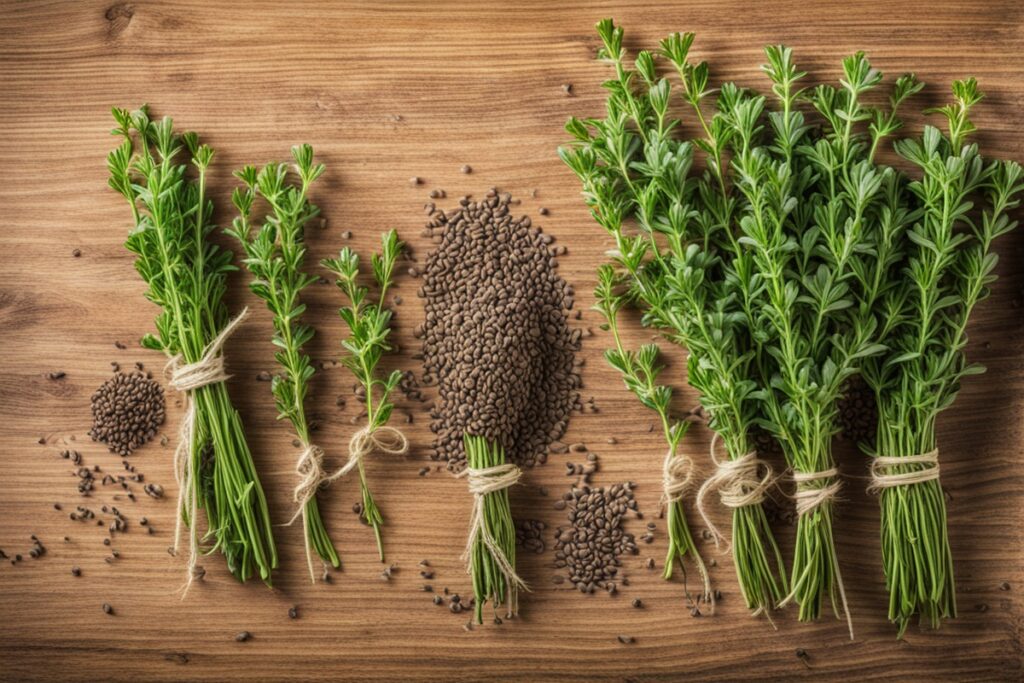
Check the seed packet for freshness, too. Thyme seeds are viable for about 1-3 years if stored properly, but fresher seeds tend to have higher germination rates. If you’re unsure, do a quick germination test before planting—place a few seeds on a damp paper towel, seal it in a plastic bag, and see if they sprout in 1-2 weeks. This little trick can save you a lot of frustration down the line.
Preparing to Raise Thyme Seeds: Timing and Setup
Timing is everything when you’re raising thyme seeds from scratch. Thyme is a Mediterranean herb, so it loves warmth and sunlight. If you’re starting indoors (which I recommend for better control), aim to sow your seeds 6-8 weeks before the last expected frost in your area. For most folks, that’s late winter to early spring. I usually start mine in February, giving the seedlings plenty of time to grow strong before moving them outside in May.
As for setup, you don’t need fancy equipment, but a few basics go a long way. Grab some seed trays or small pots with drainage holes, a well-draining seed-starting mix (not regular potting soil—it’s too heavy), and a sunny spot or grow light. Thyme seeds need light to germinate, so don’t bury them deep. Just press them lightly into the soil surface. Keep the soil consistently moist but not waterlogged—think of it like a damp sponge. I’ve found that using a spray bottle helps avoid overwatering those delicate seeds in the early days.
The Germination Game: Patience Pays Off
Here’s where a lot of people get tripped up: germination. Thyme seeds can take anywhere from 14 to 28 days to sprout, and that waiting game can test your patience. Trust me, I’ve been there, staring at a tray of dirt, wondering if I did something wrong. But here’s the thing—thyme seeds need warmth (around 70°F or 21°C) and light to wake up. If your home is on the cooler side, consider placing the tray on a heat mat or near a warm spot like the top of a fridge.
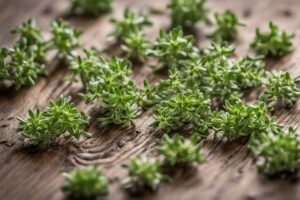
Once those tiny sprouts appear, celebrate the small win, but don’t get complacent. Thin out the weaker seedlings if they’re crowded—overcrowding can lead to damping off, a fungal issue that’s basically a death sentence for young plants. I usually snip off the extras with scissors rather than pulling them out to avoid disturbing the roots. Keep the soil moist and provide at least 6-8 hours of light daily. If you’re using a grow light, position it about 2-3 inches above the seedlings to prevent them from getting leggy. Watching them grow day by day is like watching a slow-motion miracle unfold.
Transplanting and Caring for Thyme Seedlings
Once your thyme seedlings have a couple of sets of true leaves—usually about 6-8 weeks after germination—they’re ready to move to a bigger pot or your garden. But don’t rush this step. Harden them off first by gradually exposing them to outdoor conditions over a week or so. Start with an hour outside in a shaded spot, then increase the time and sunlight exposure each day. I learned this the hard way when I skipped hardening off and lost half my batch to sun scorch. Ouch.
When planting, choose a spot with full sun and well-draining soil—thyme hates “wet feet.” If your soil is heavy or clay-like, mix in some sand or perlite to improve drainage. Space plants about 12-18 inches apart to give them room to spread. Water sparingly after transplanting; thyme is drought-tolerant once established and doesn’t like to be babied. In fact, overwatering is one of the biggest mistakes new gardeners make. Imagine you’re dealing with a desert plant—less is often more.
Troubleshooting Common Issues When Raising Thyme Seeds
Even with the best intentions, things can go sideways when you’re raising thyme seeds from scratch. Let’s talk about a few common hiccups and how to handle them. If your seeds aren’t germinating after a month, check your conditions—too cold or too dark could be the culprit. On the flip side, if seedlings are wilting, you might be overwatering or dealing with poor drainage. I once had a tray of thyme seedlings collapse overnight due to damping off, and it was heartbreaking. The fix? Use sterile soil, avoid overwatering, and ensure good air circulation.
Pests like aphids can also sneak in, especially if you move plants outside. A gentle spray of soapy water usually does the trick without harming the plant. And if growth seems stunted, consider a diluted organic fertilizer, though thyme doesn’t need much feeding. The key is to observe and adjust. Gardening is as much about problem-solving as it is about planting, and every challenge teaches you something new.
References
- University of Minnesota Extension – Growing Herbs
- Clemson University Cooperative Extension – Thyme Factsheet
- Missouri Botanical Garden – Thymus vulgaris
- Penn State Extension – Growing Herbs Indoors
- Royal Horticultural Society – Growing Thyme
Disclaimer: This article is for informational purposes only, based on general research and personal experience. It is not intended to serve as a substitute for professional advice. Gardening conditions, climates, and individual circumstances can vary widely, so results may differ from those described. Always consult a qualified horticulturist, local extension service, or other professional for personalized guidance tailored to your specific situation. The author and publisher are not responsible for any adverse effects or consequences resulting from the use of the information provided in this content.
This content is for informational purposes only and not a substitute for professional advice.